Synchronizing the ergohaven-zmk-config Fork on GitHub
Keyboard firmwares are constantly being refined and updated, and if the improvements are general in nature and have been made to the main ZMK repository, these updates will be automatically pulled in during the next firmware build, for example after changing the layout. However, the ergohaven-zmk-config repository, which contains keyboard layouts and configuration files, is also periodically updated. Updates may contain, for example, files necessary for building firmware for new devices, or some improvements to already released devices. Unlike updates in ZMK, updates in ergohaven-zmk-config are not applied automatically. To incorporate them into your fork, you need to perform a synchronization procedure. This guide will explain how to perform the synchronization procedure.
The GitHub application is third-party software, and the author may not know some details of its functionality, and some functionality may change over time. If you have any questions or problems, please write to the Ergohaven community on Telegram.
Synchronizing the Fork
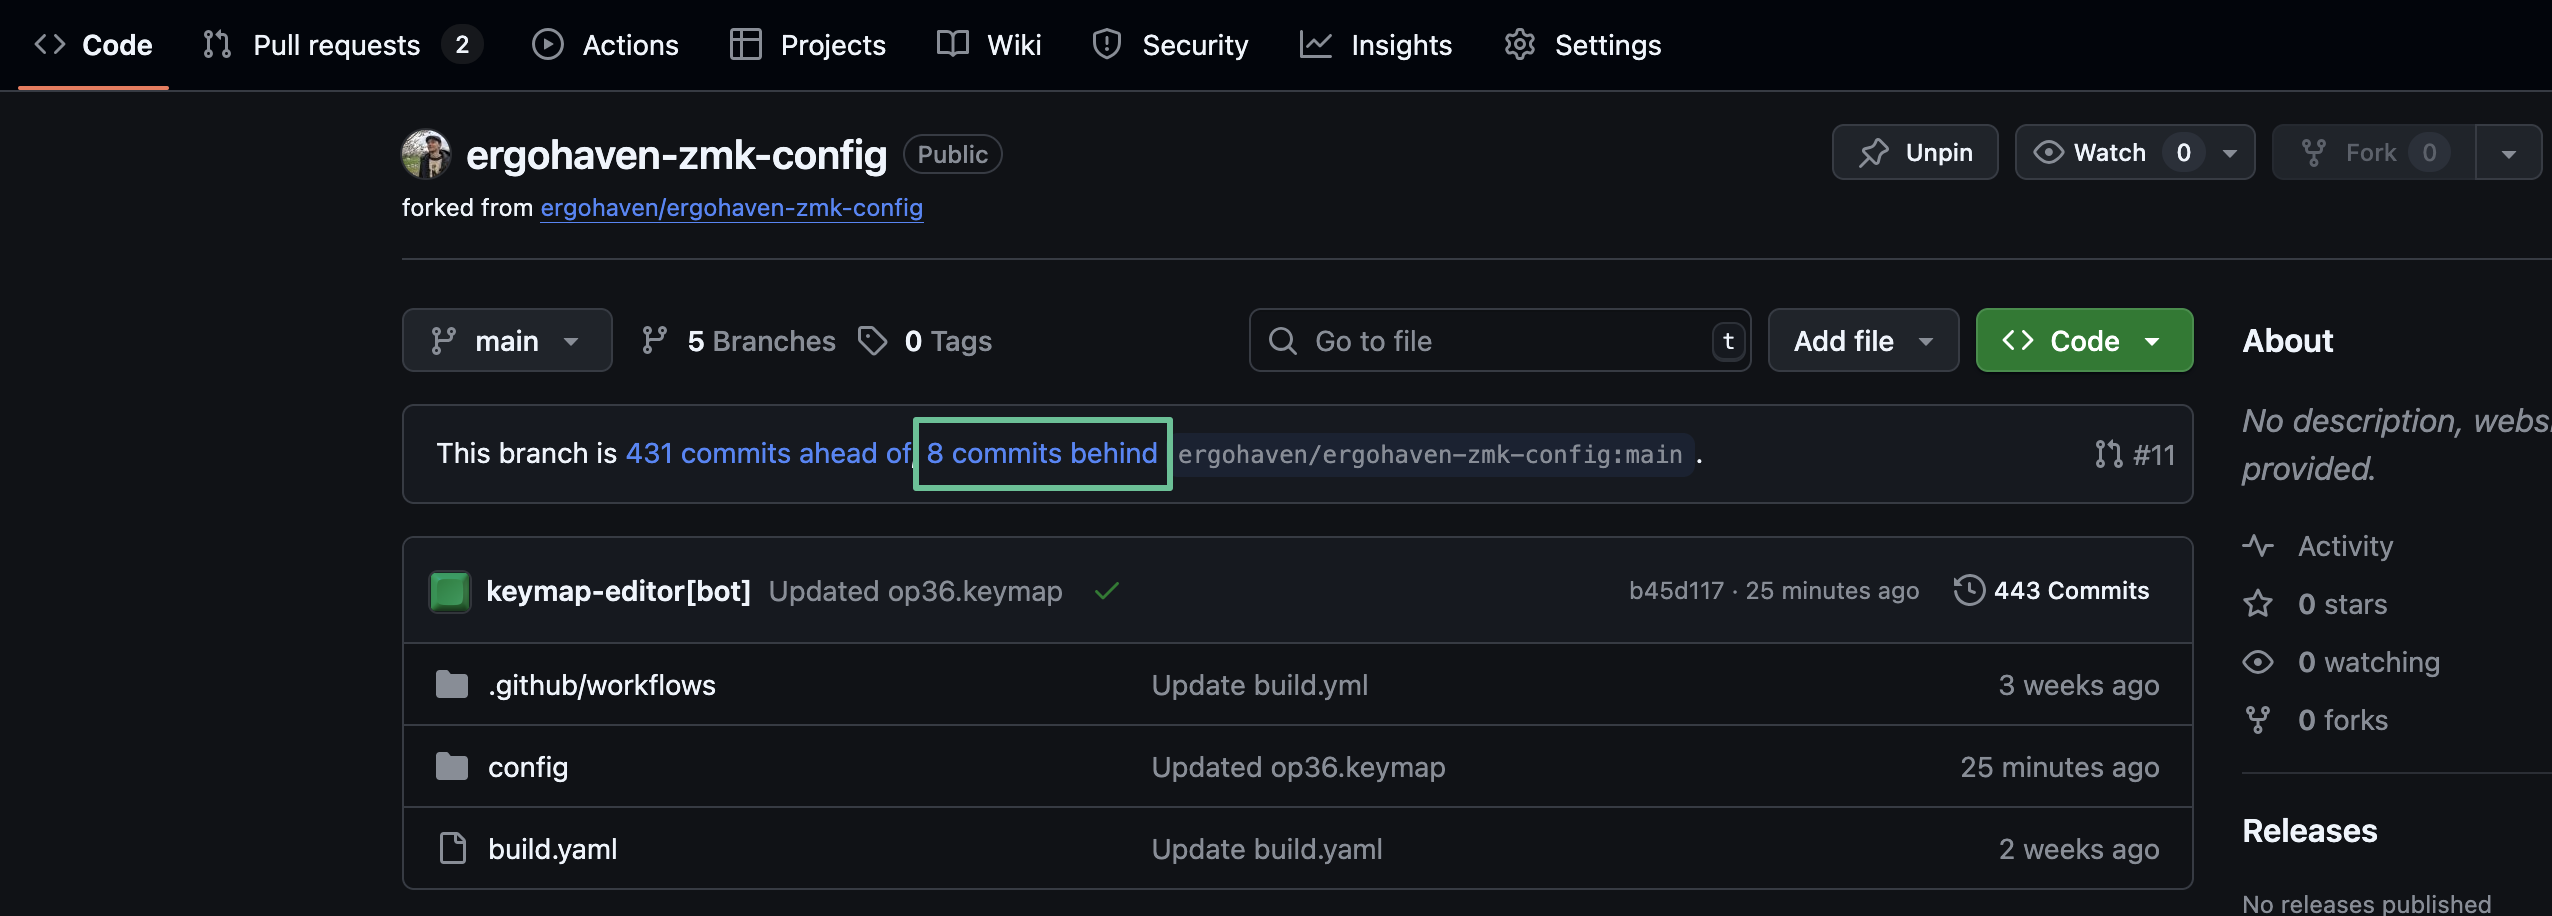
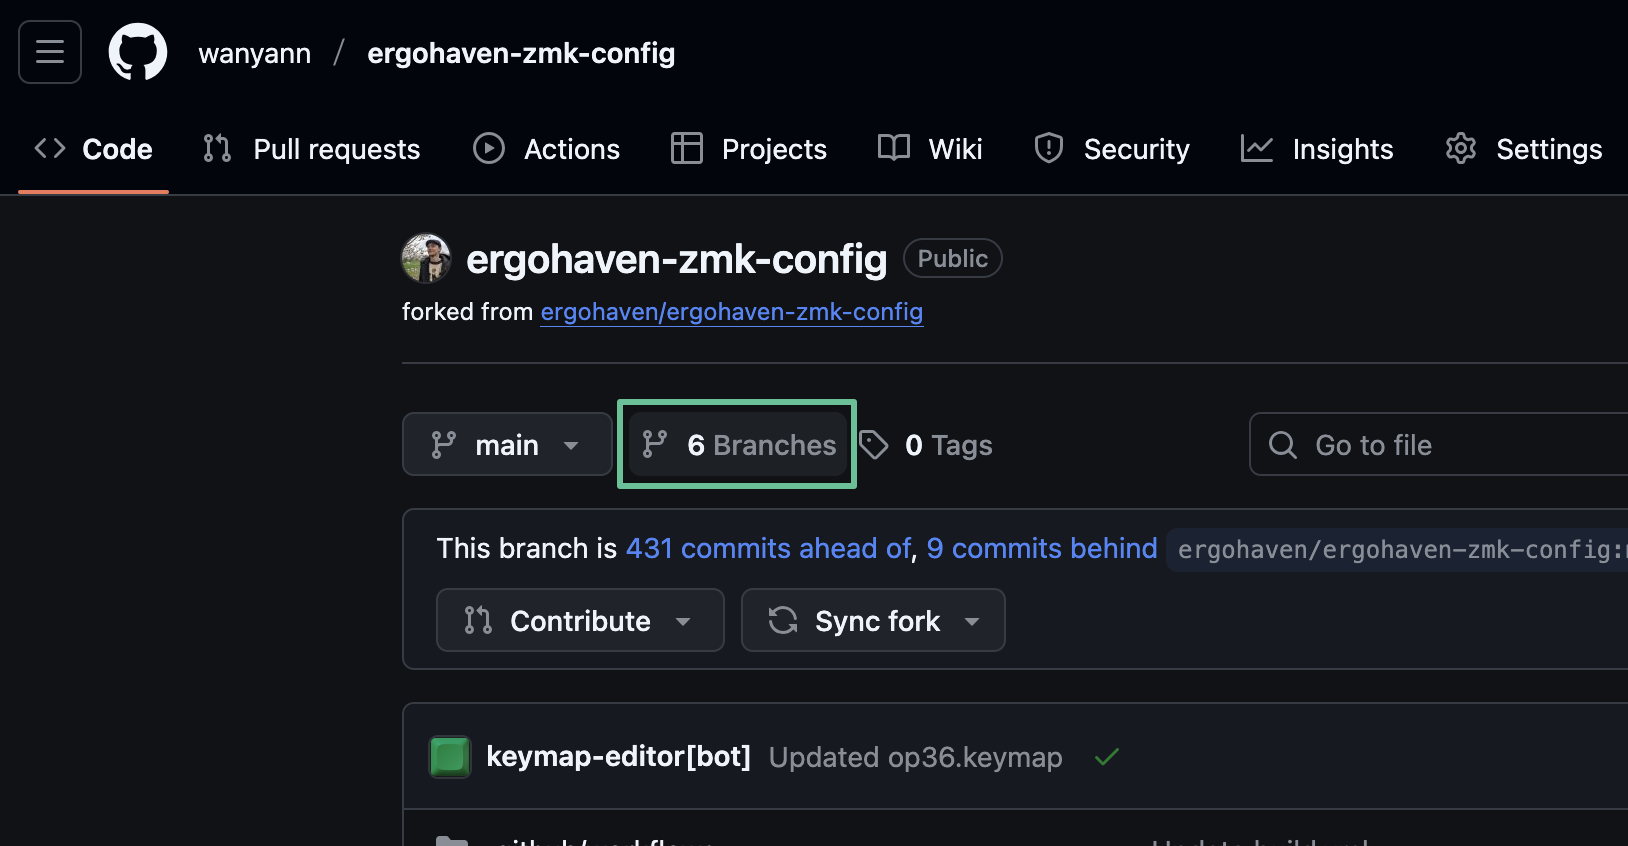
You can find out about the need to synchronize the fork by the appearance of a link with the text “commits behind” on the Code tab of the fork. Under normal conditions, a Sync fork button should also appear. If it is not there, go to the Sync Fork Button Not Displayed section.
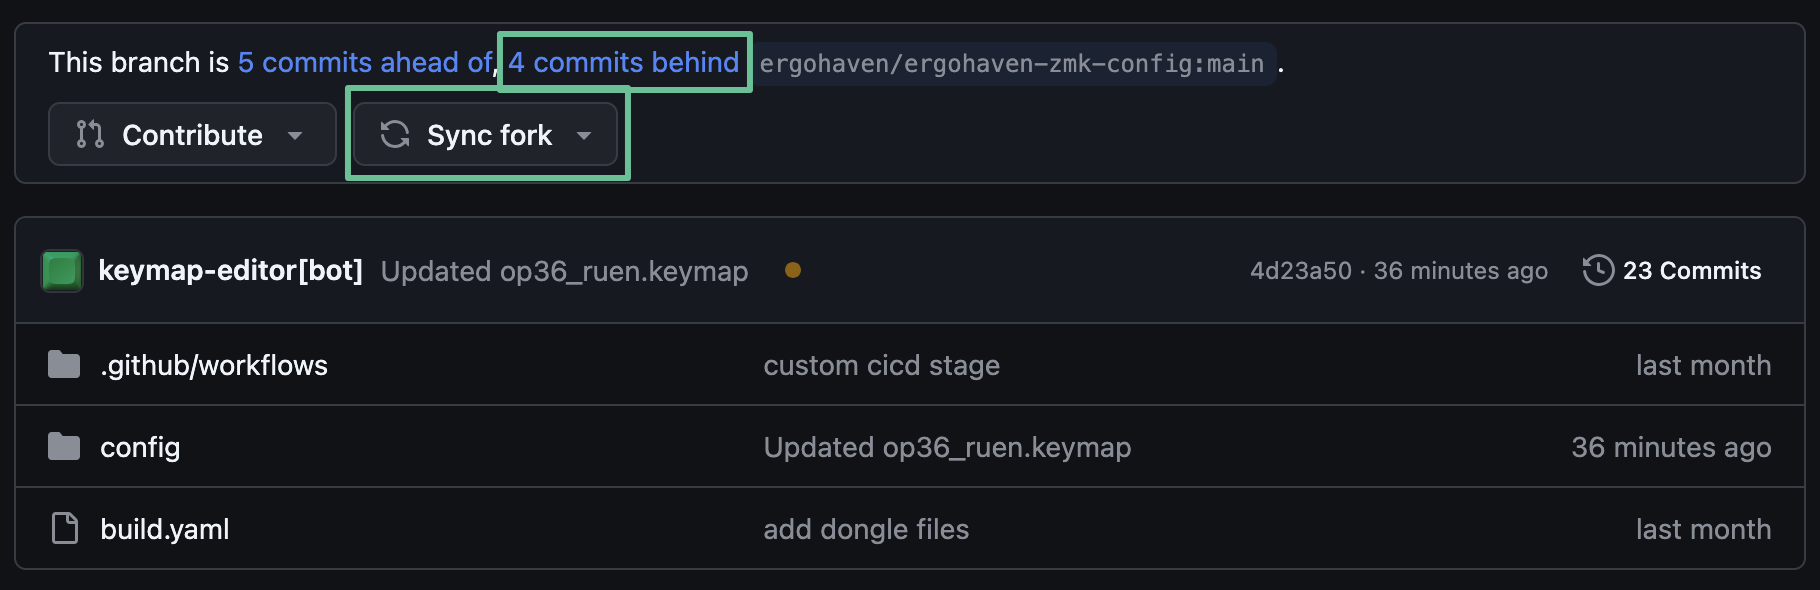
To synchronize, click the Sync fork button.
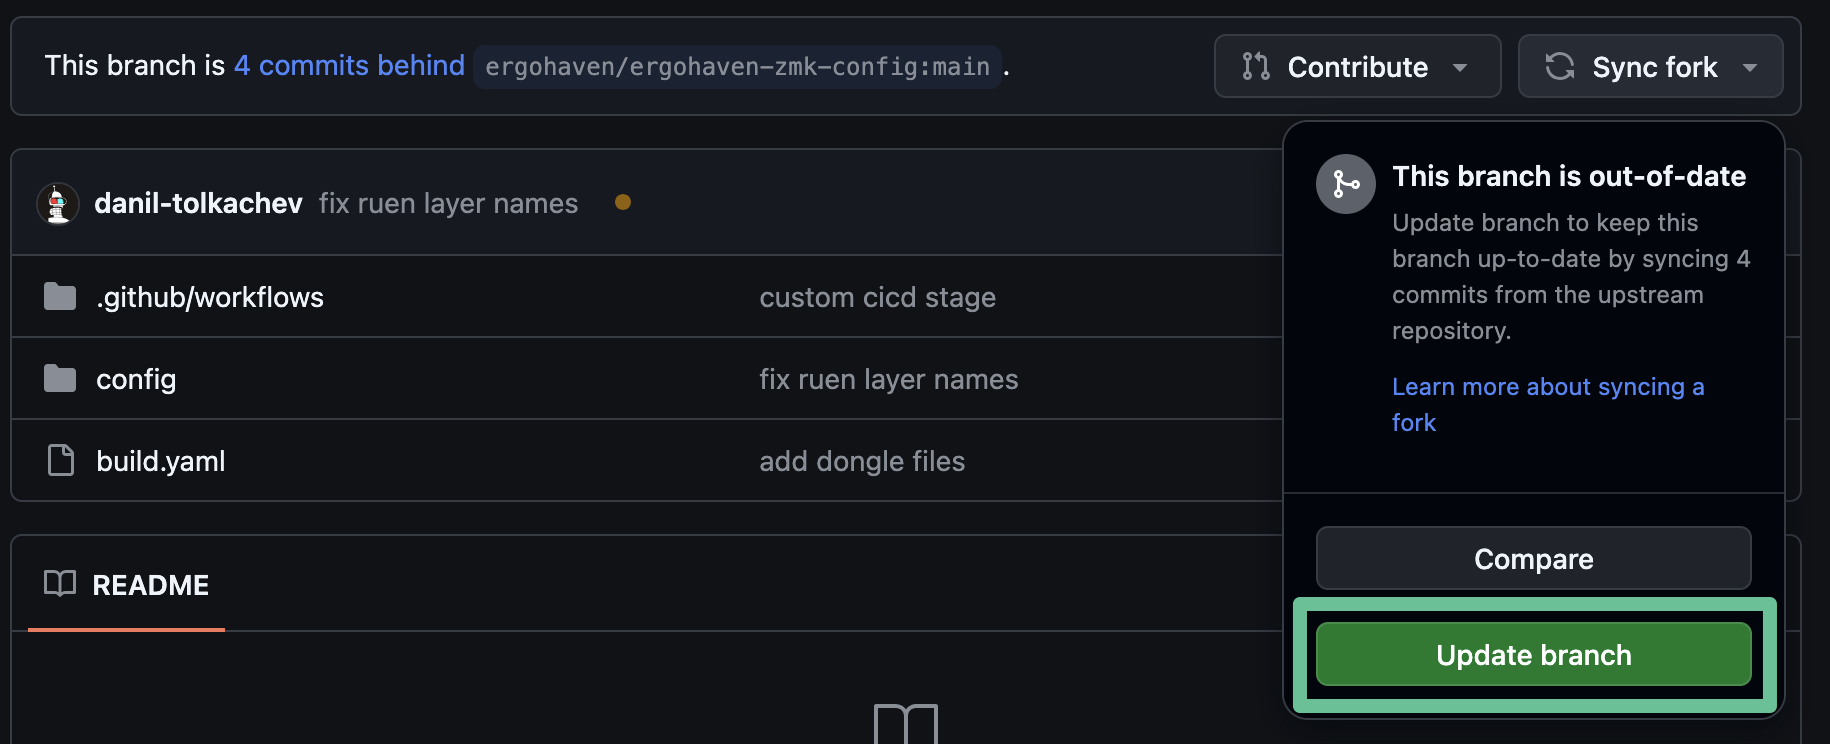
In the window that appears, click the Update branch button and that’s it, the fork is successfully synchronized, all changes from the main repository are already in your fork.
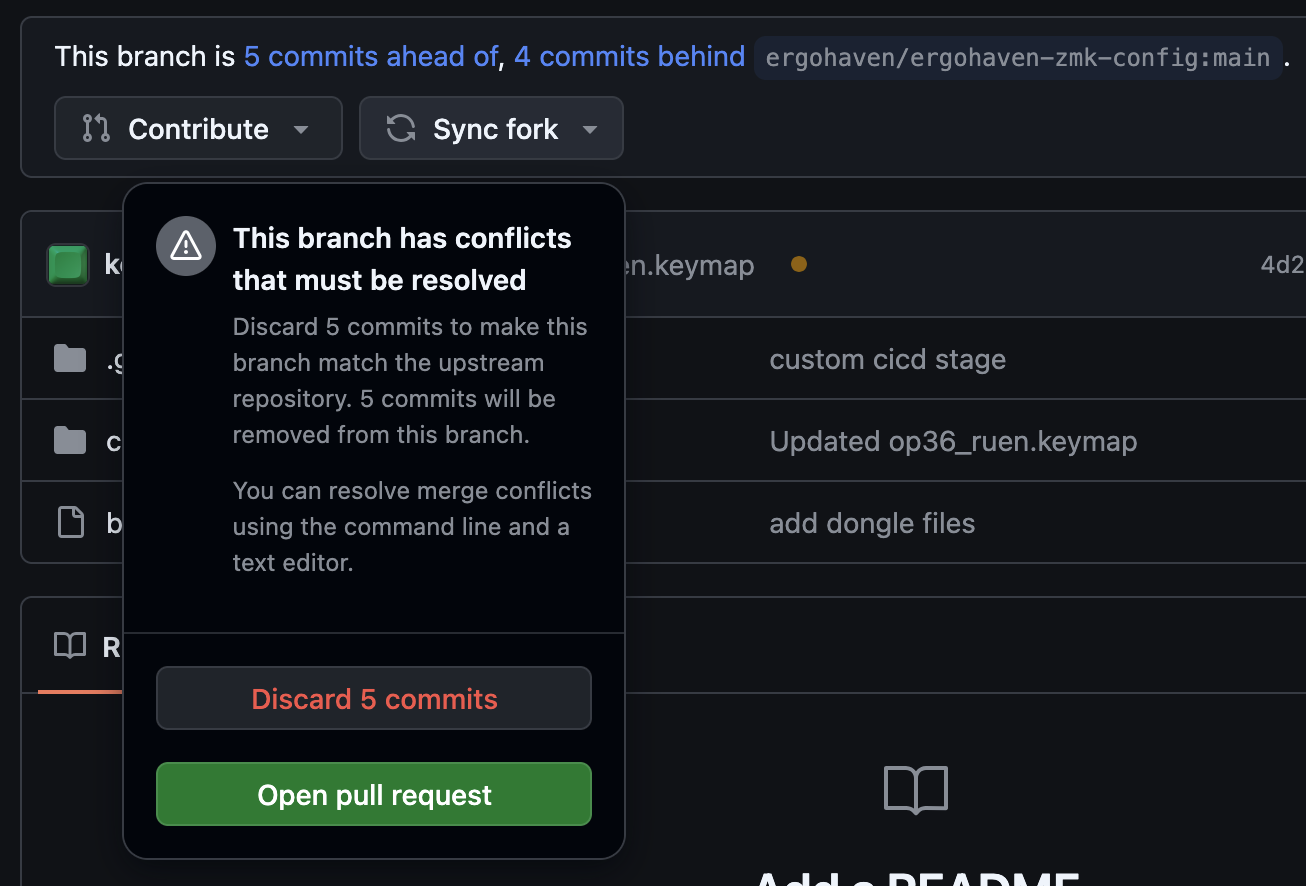
If after clicking Sync fork a window with the title “This branch has conflicts that must be resolved” is displayed, there are 2 synchronization options:
- Discard all changes you have made to the fork. WARNING, the layout in your fork will return to the default, so only do this if you are sure that you can easily restore all your changes. To discard changes while synchronizing the fork, click Discard commits.
- Resolve merge conflicts. Resolving conflicts is described in the Synchronization with Merge Conflicts section.
Sync Fork Button Not Displayed
To start the synchronization procedure, click on the link with the text “commits behind” on the Code tab of the fork.
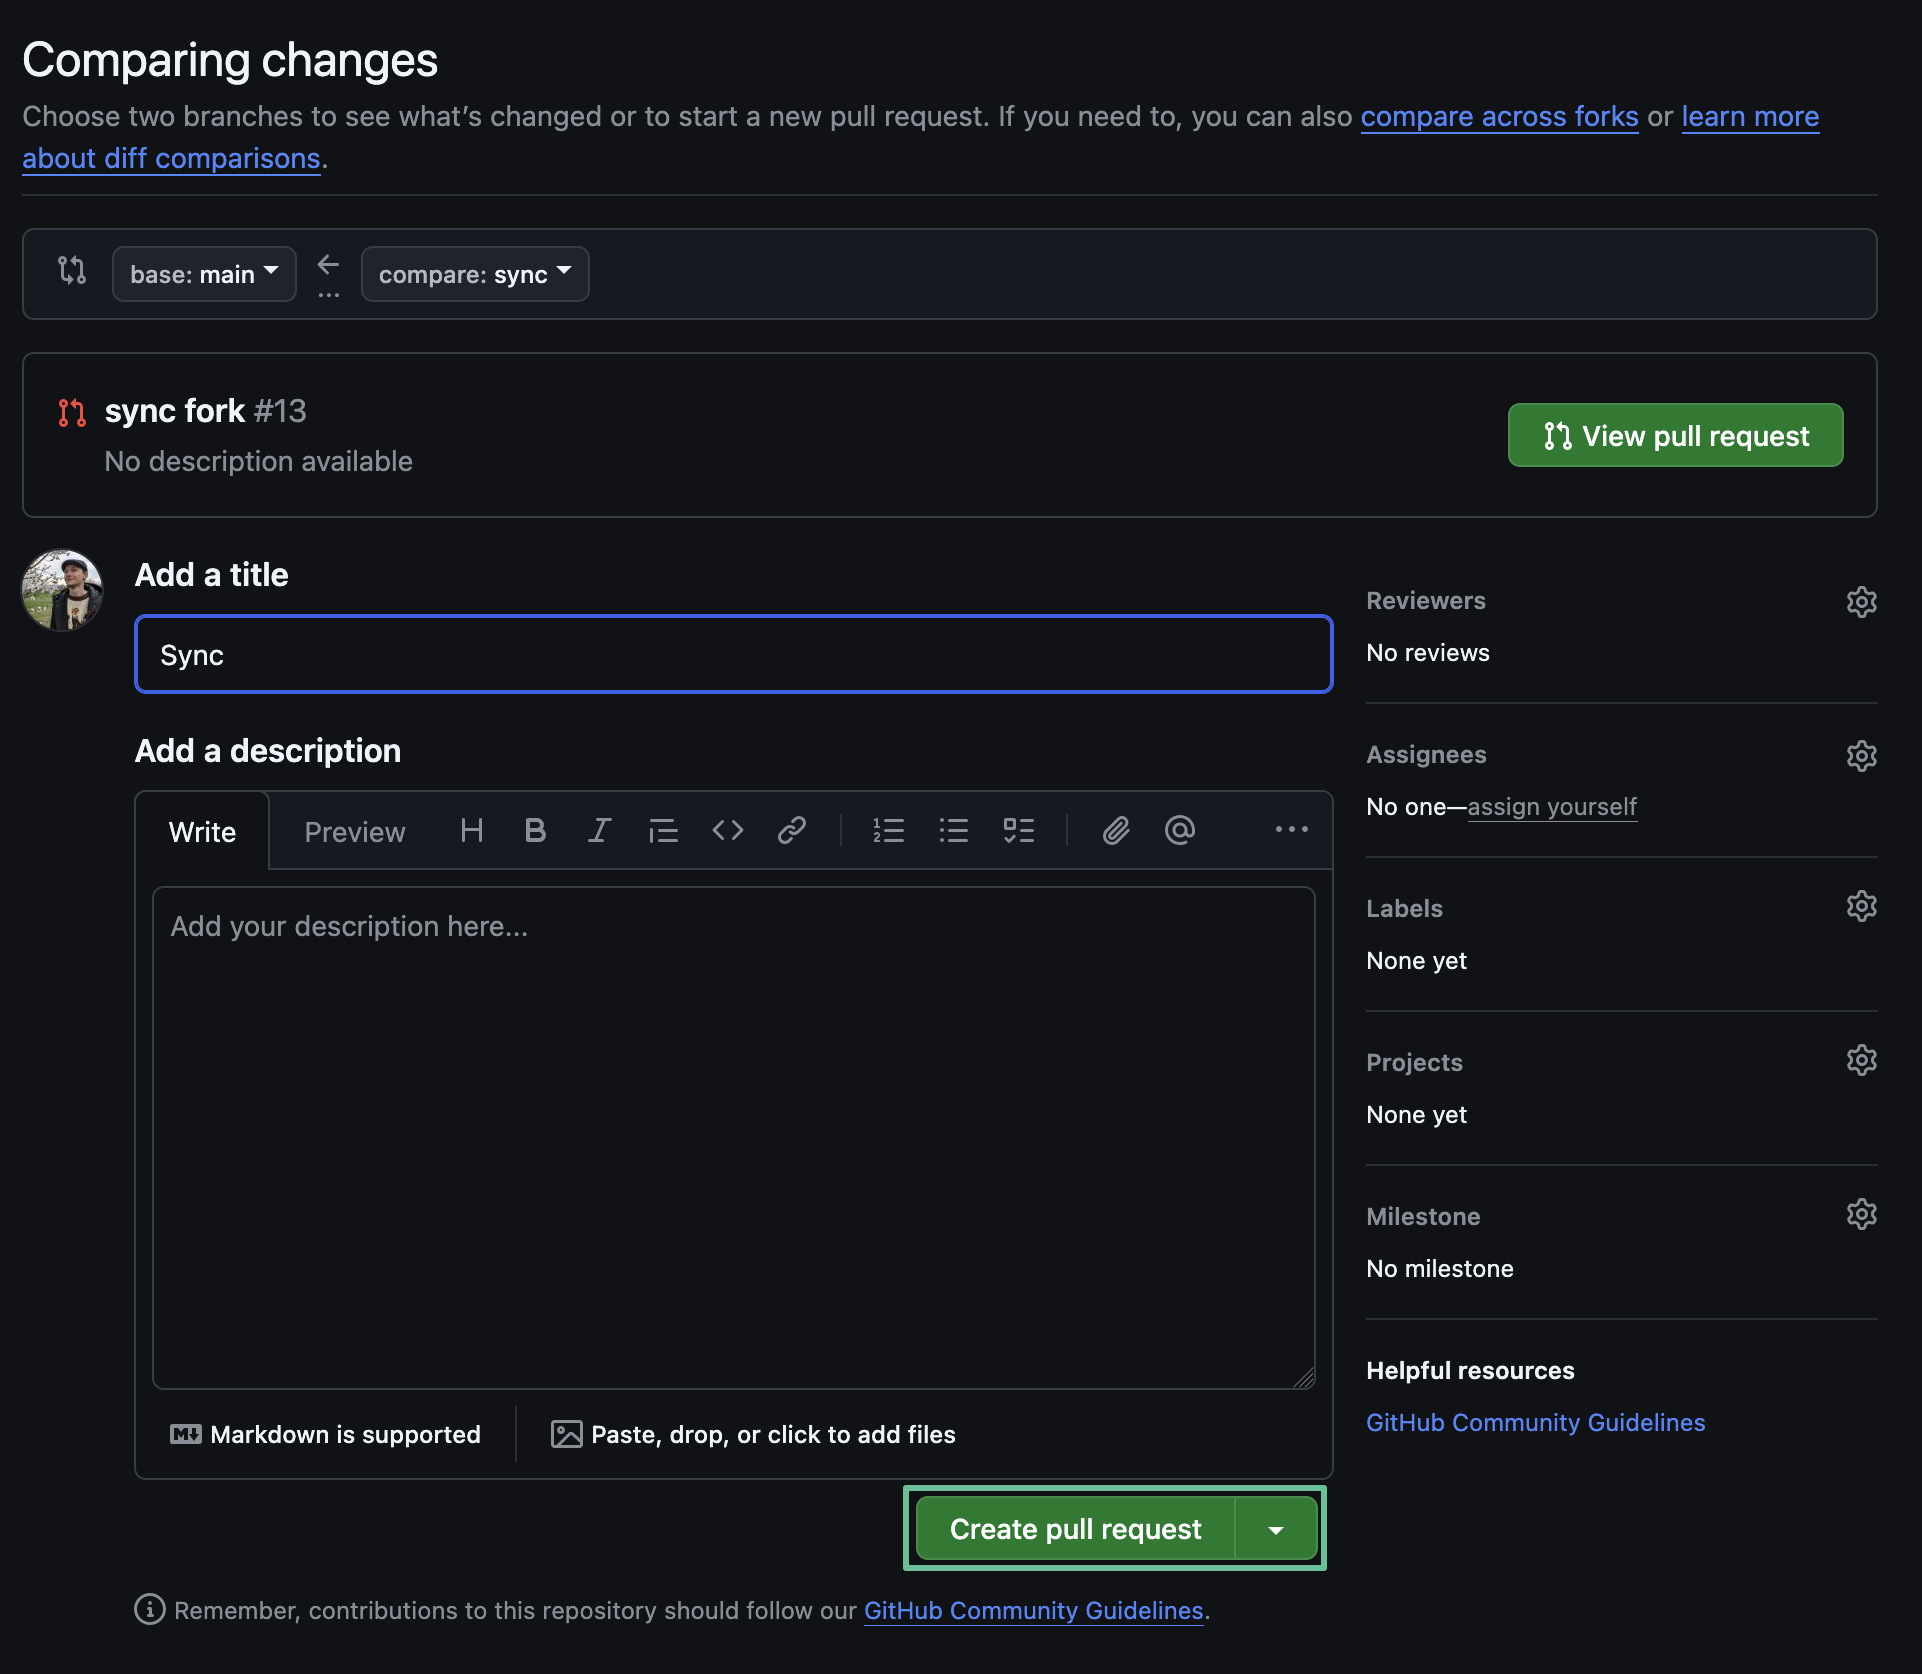
The “Comparing changes” page will open, pay attention to the default values:
- base repository - by default "{Your GitHub nickname}/ergohaven-zmk-config" should be selected;
- base - by default “main” should be selected;
- head repository - by default “ergohaven/ergohaven-zmk-config” should be selected;
- compare - by default “main” should be selected;
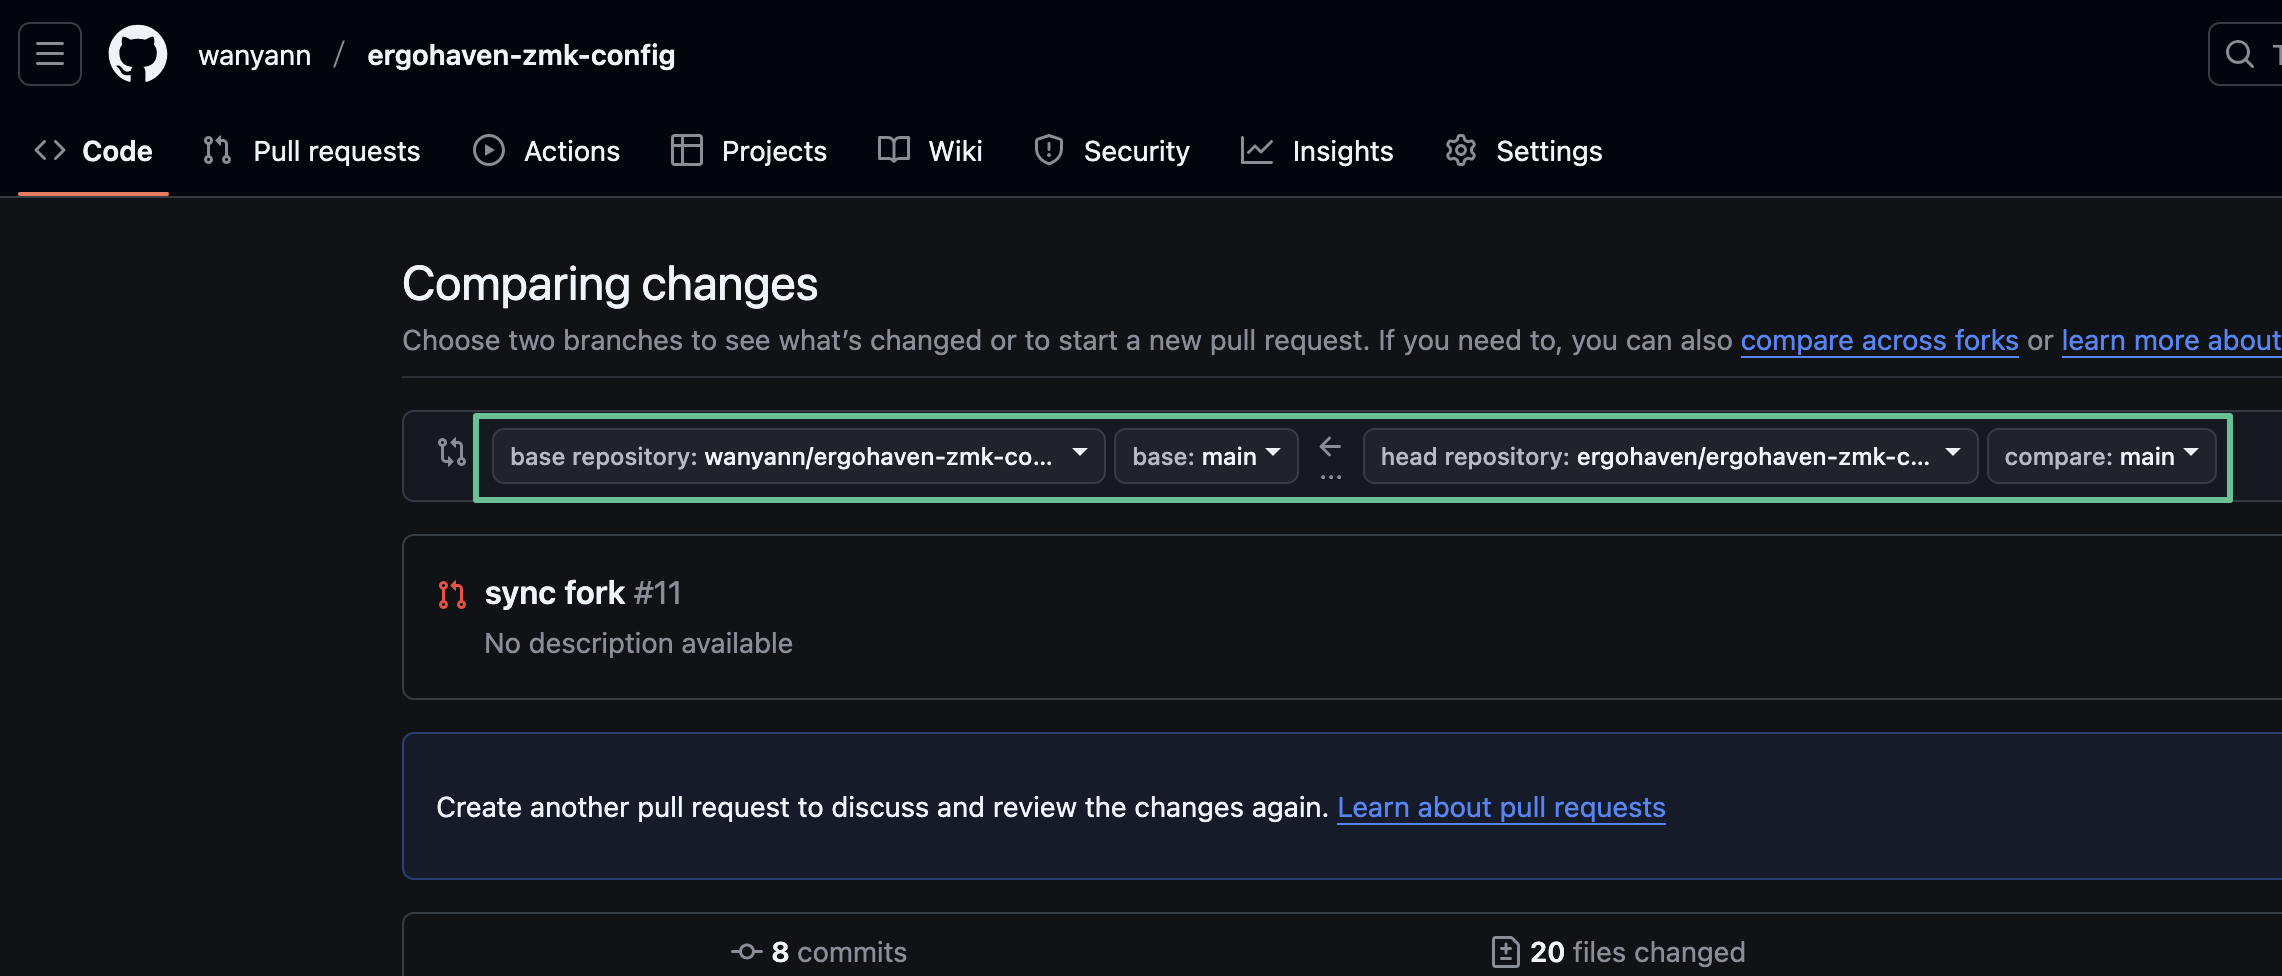
If any of the values are different, select the value that should be the default. Next, click the Create pull request button.
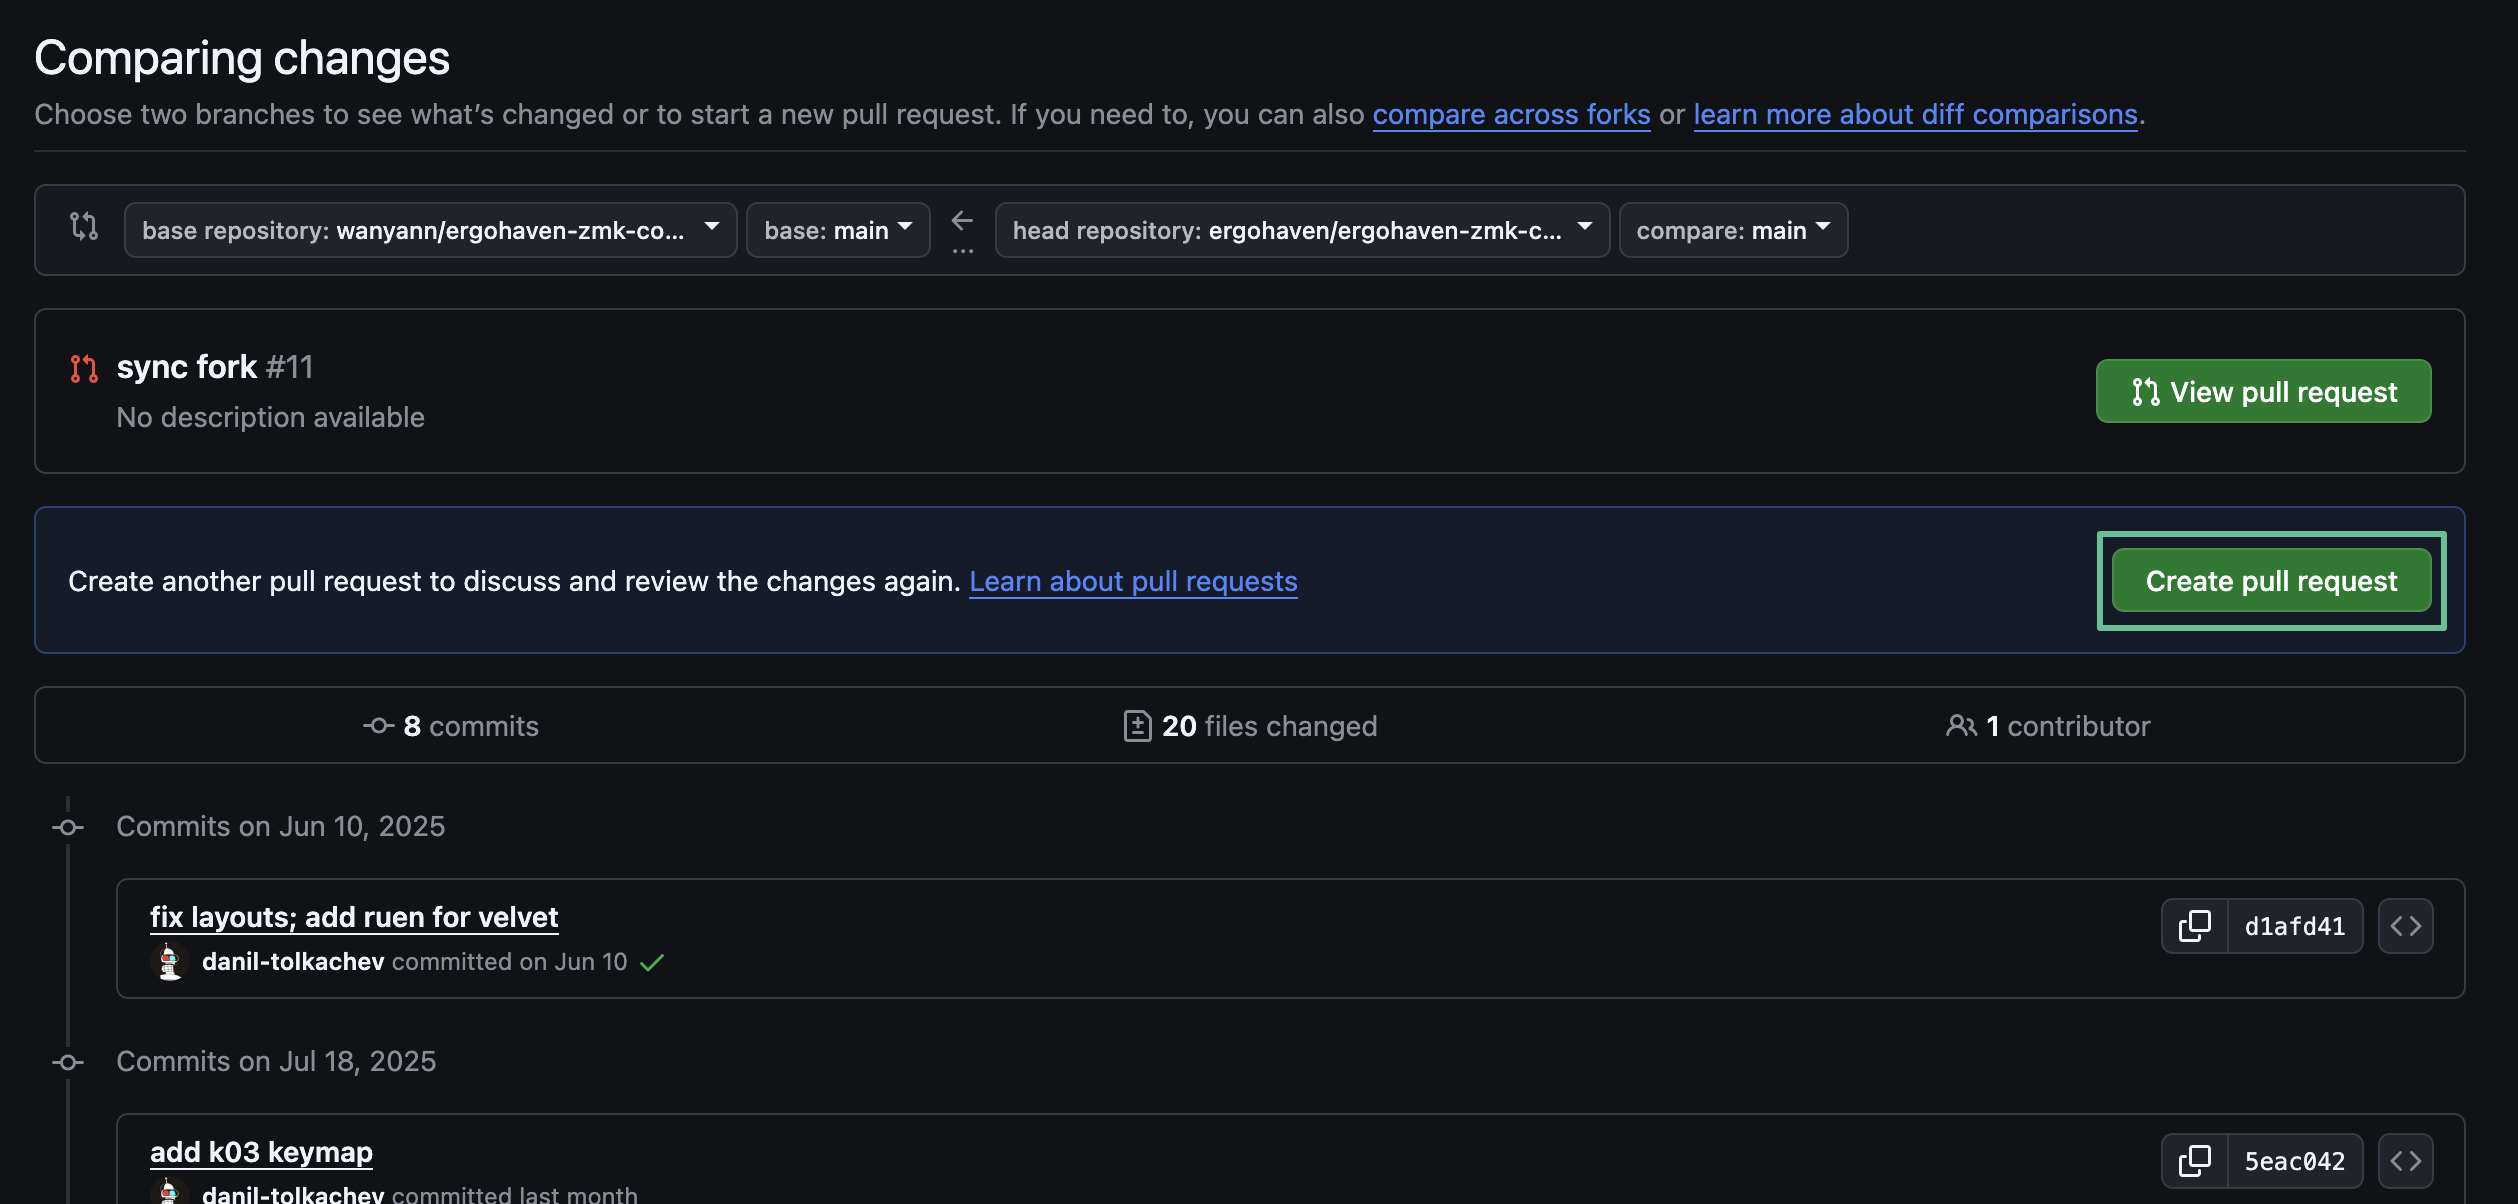
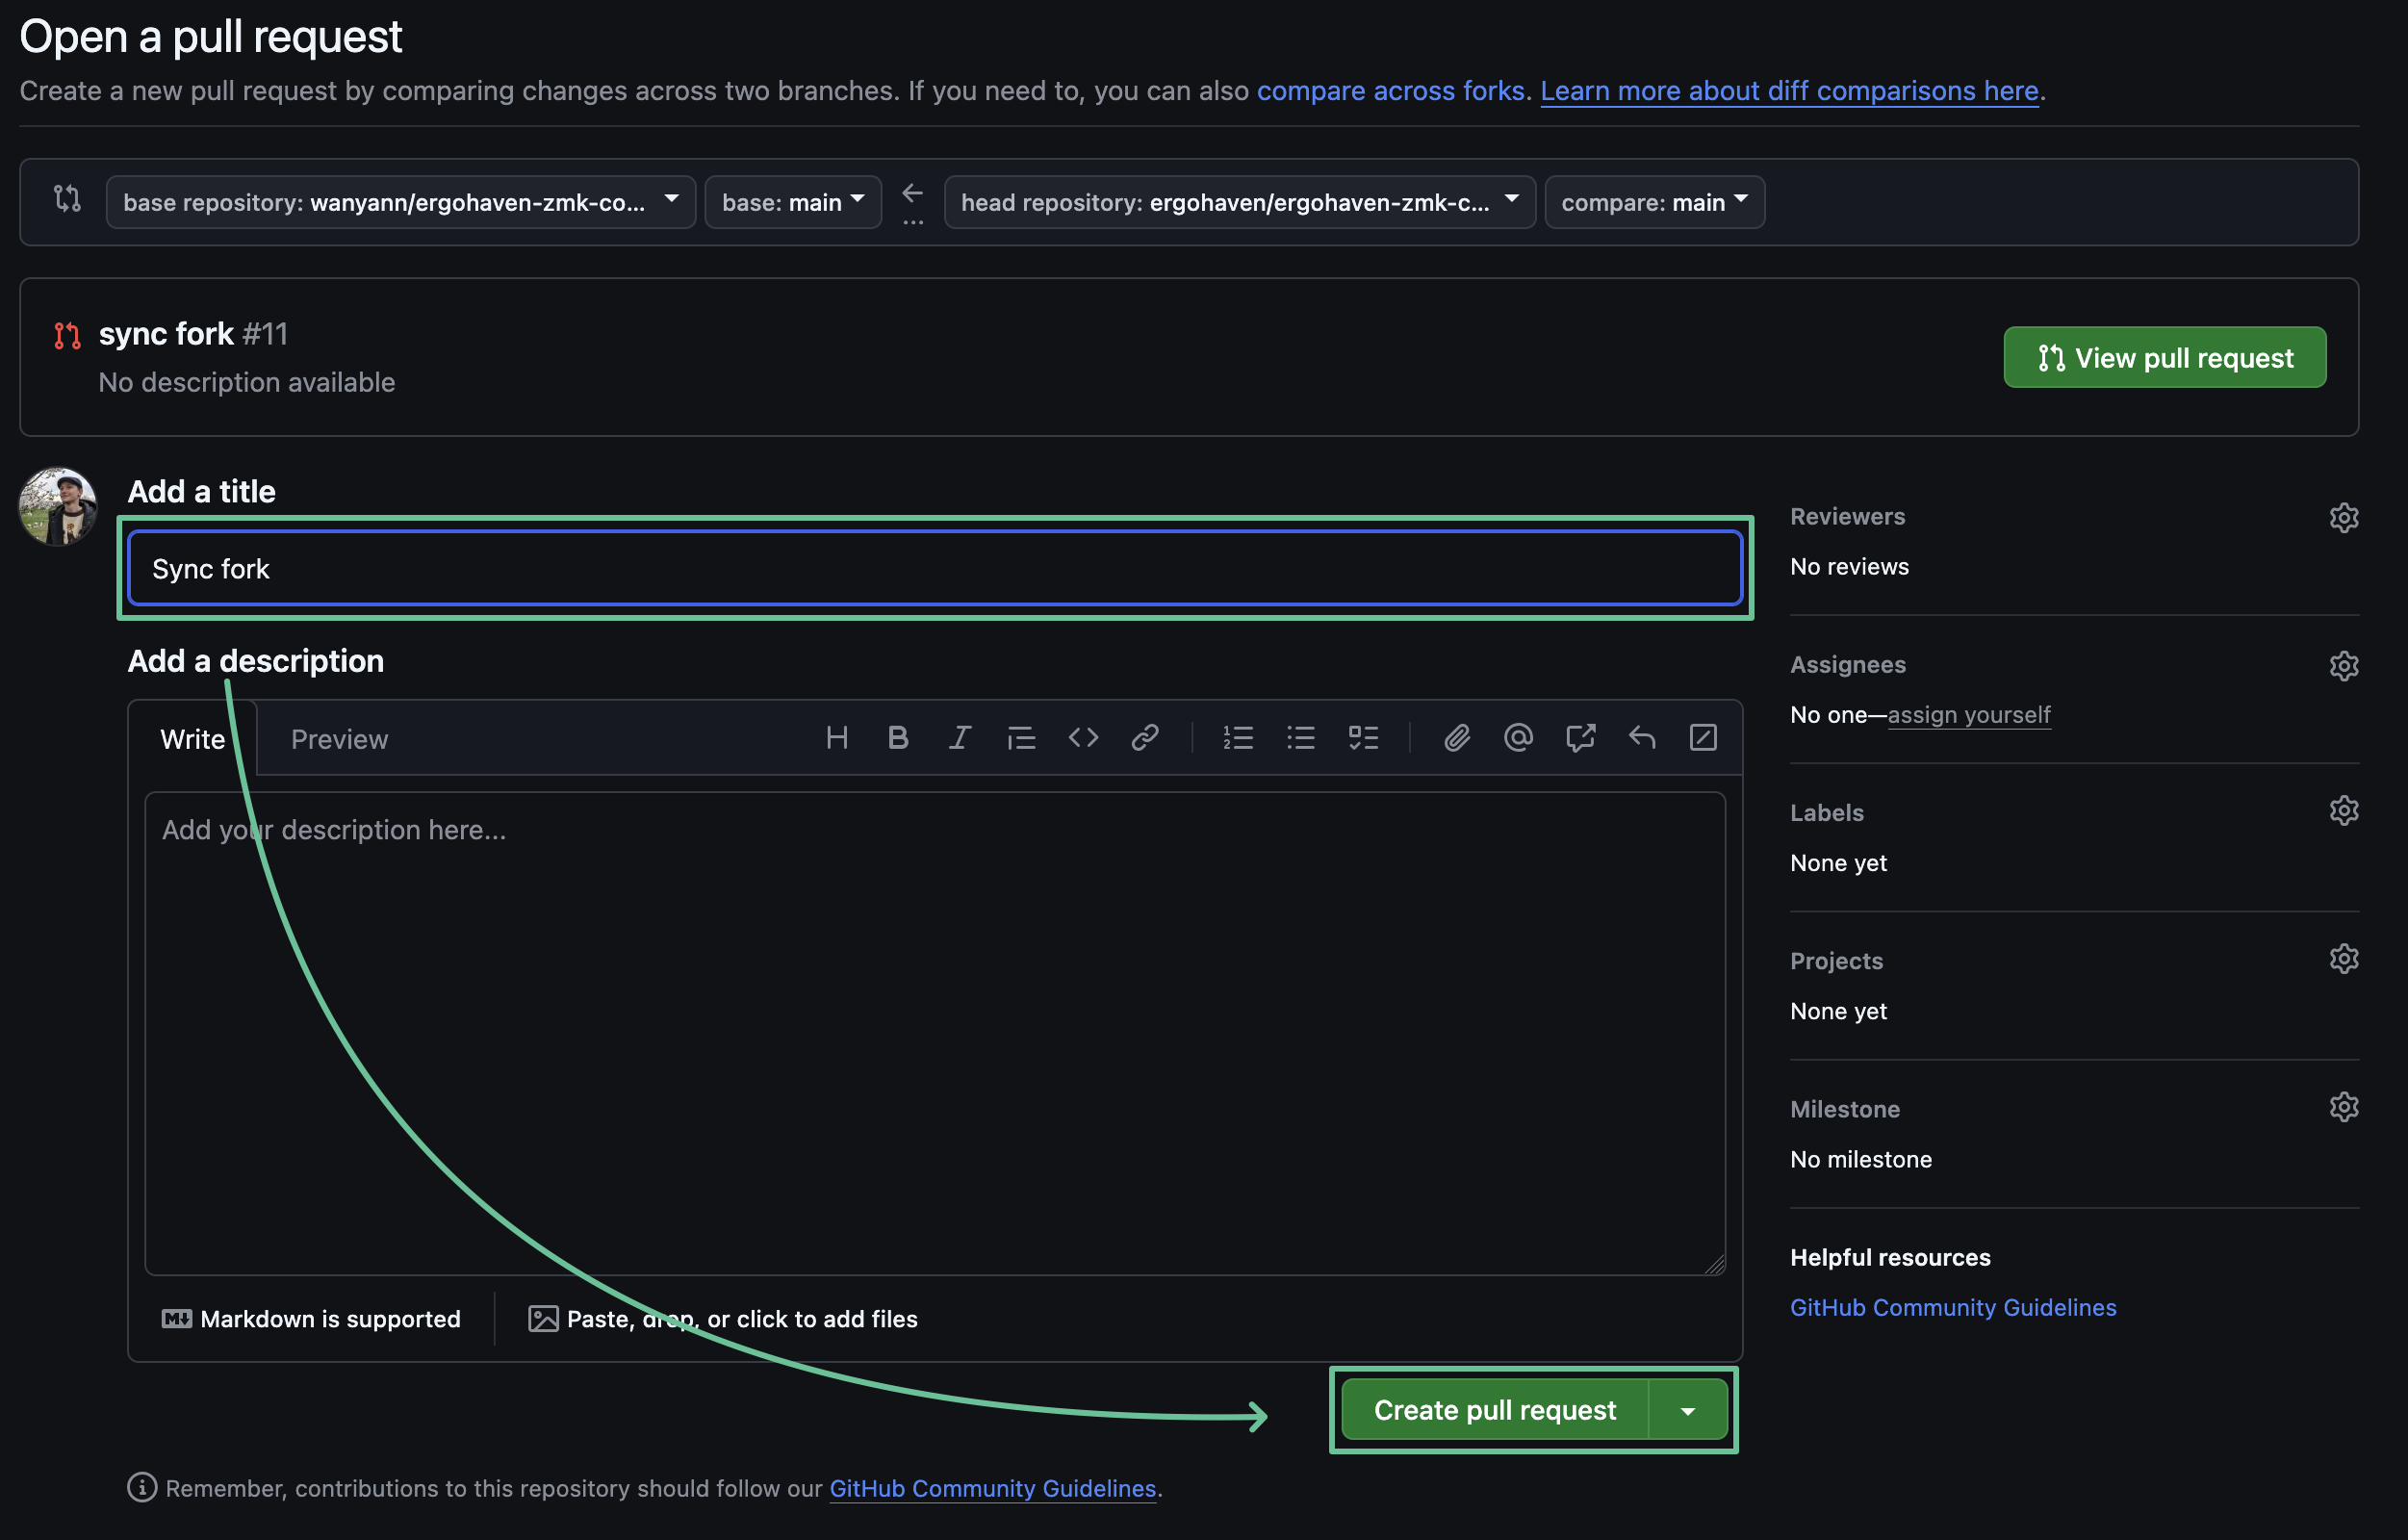
Enter the name of the pull request, if it was not filled in automatically, and click the Create pull request button.
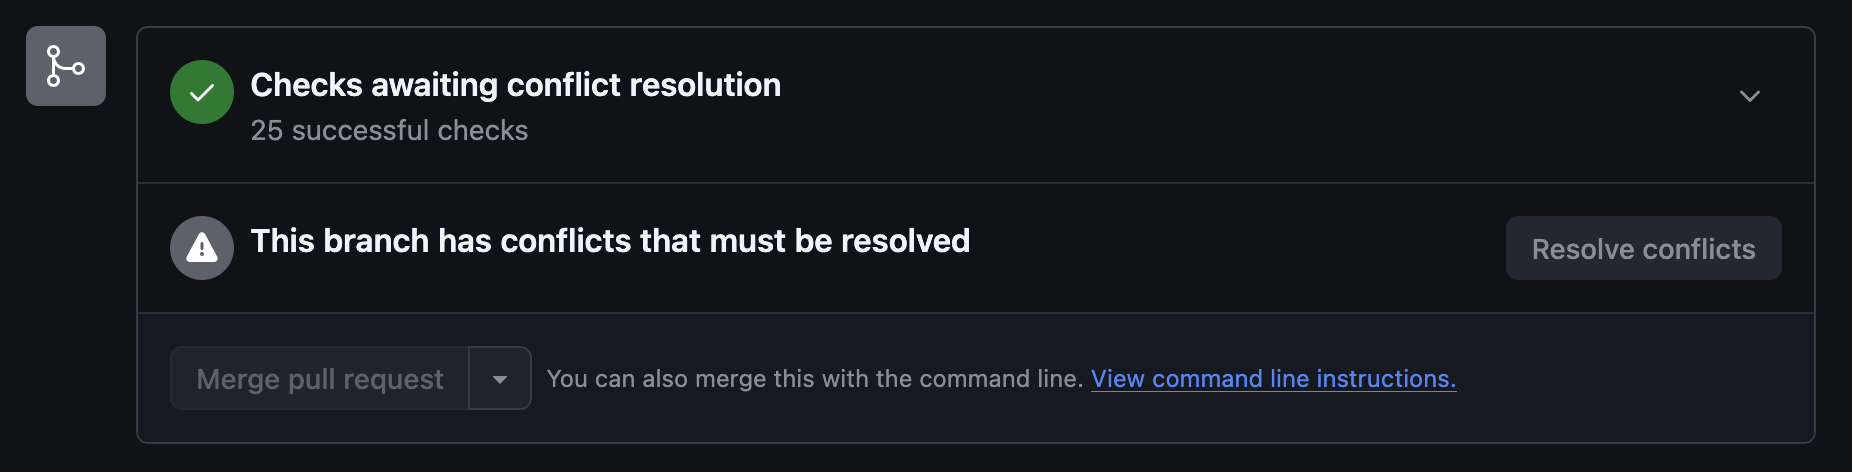
If the message “No conflicts with base branch” is displayed at the bottom of the pull request, click the Merge pull request button and the branch is successfully updated! You can go to the Actions tab, the build of the updated firmware has already started.

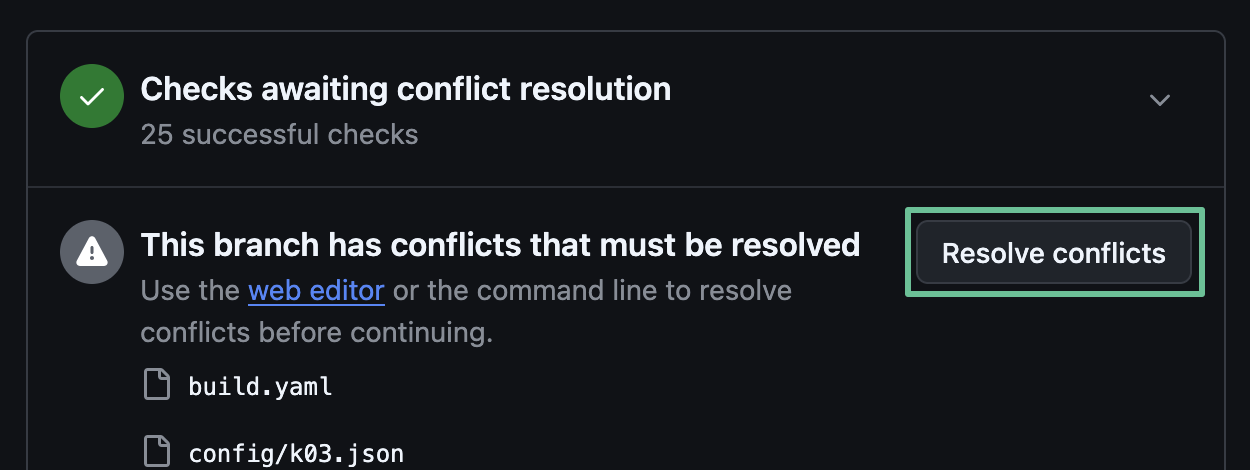
If the message “This branch has conflicts that must be resolved” is displayed at the bottom of the pull request, close the created pull request by clicking Close pull request at the bottom of the page and go to the Synchronization with Merge Conflicts section.
Synchronization with Merge Conflicts
If changes have been made to the main repository in files that you have also changed in your fork, for example .keymap files, which store keyboard layouts, then merge conflicts may occur when updating the fork. The following describes the steps to resolve them.
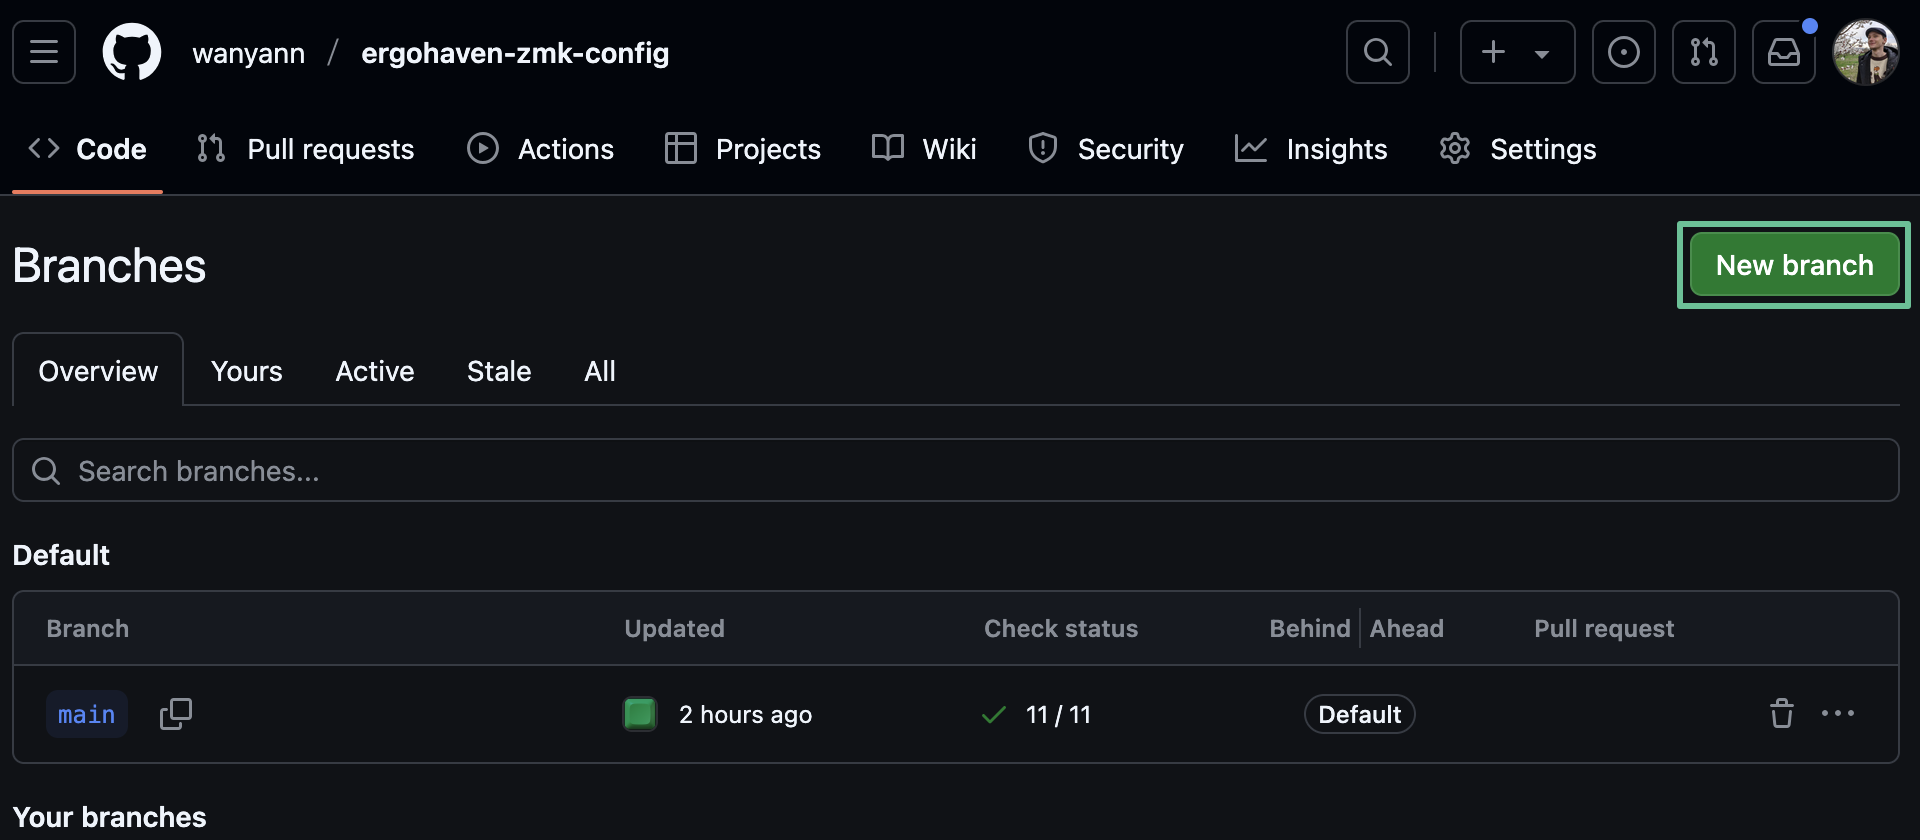
- On the Code tab, click the Branches button.
- Click New branch.
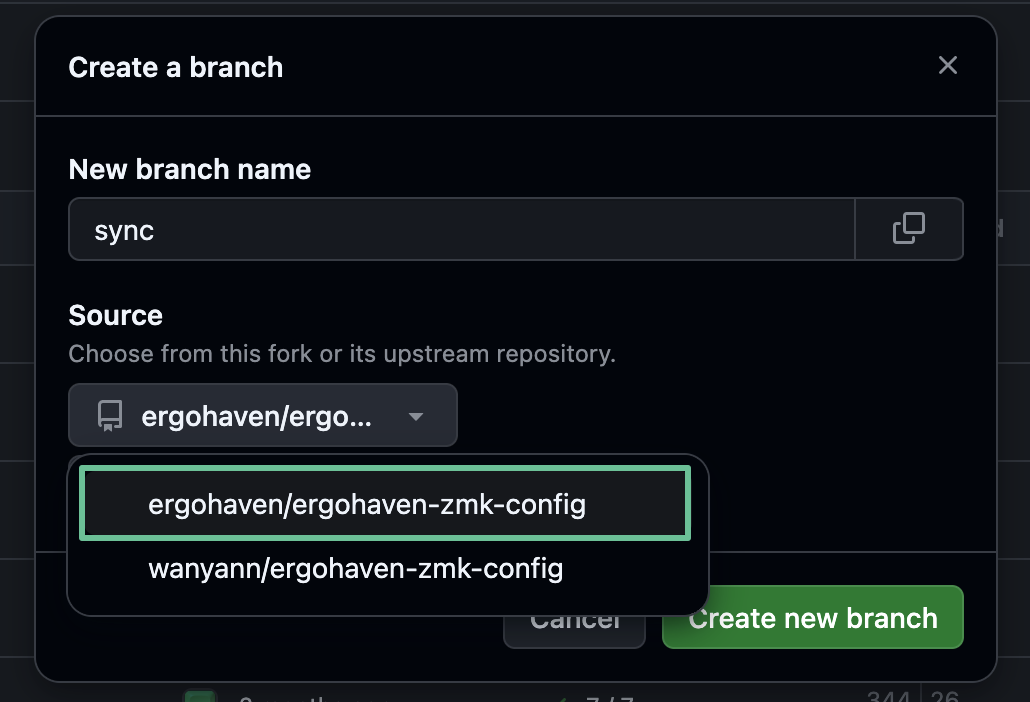
- In the window that appears, enter the name of the branch, for example “sync”, then in the drop-down list select the repository “ergohaven/ergohaven-zmk-config”, the “main” branch should be selected by default, and click Create new branch.
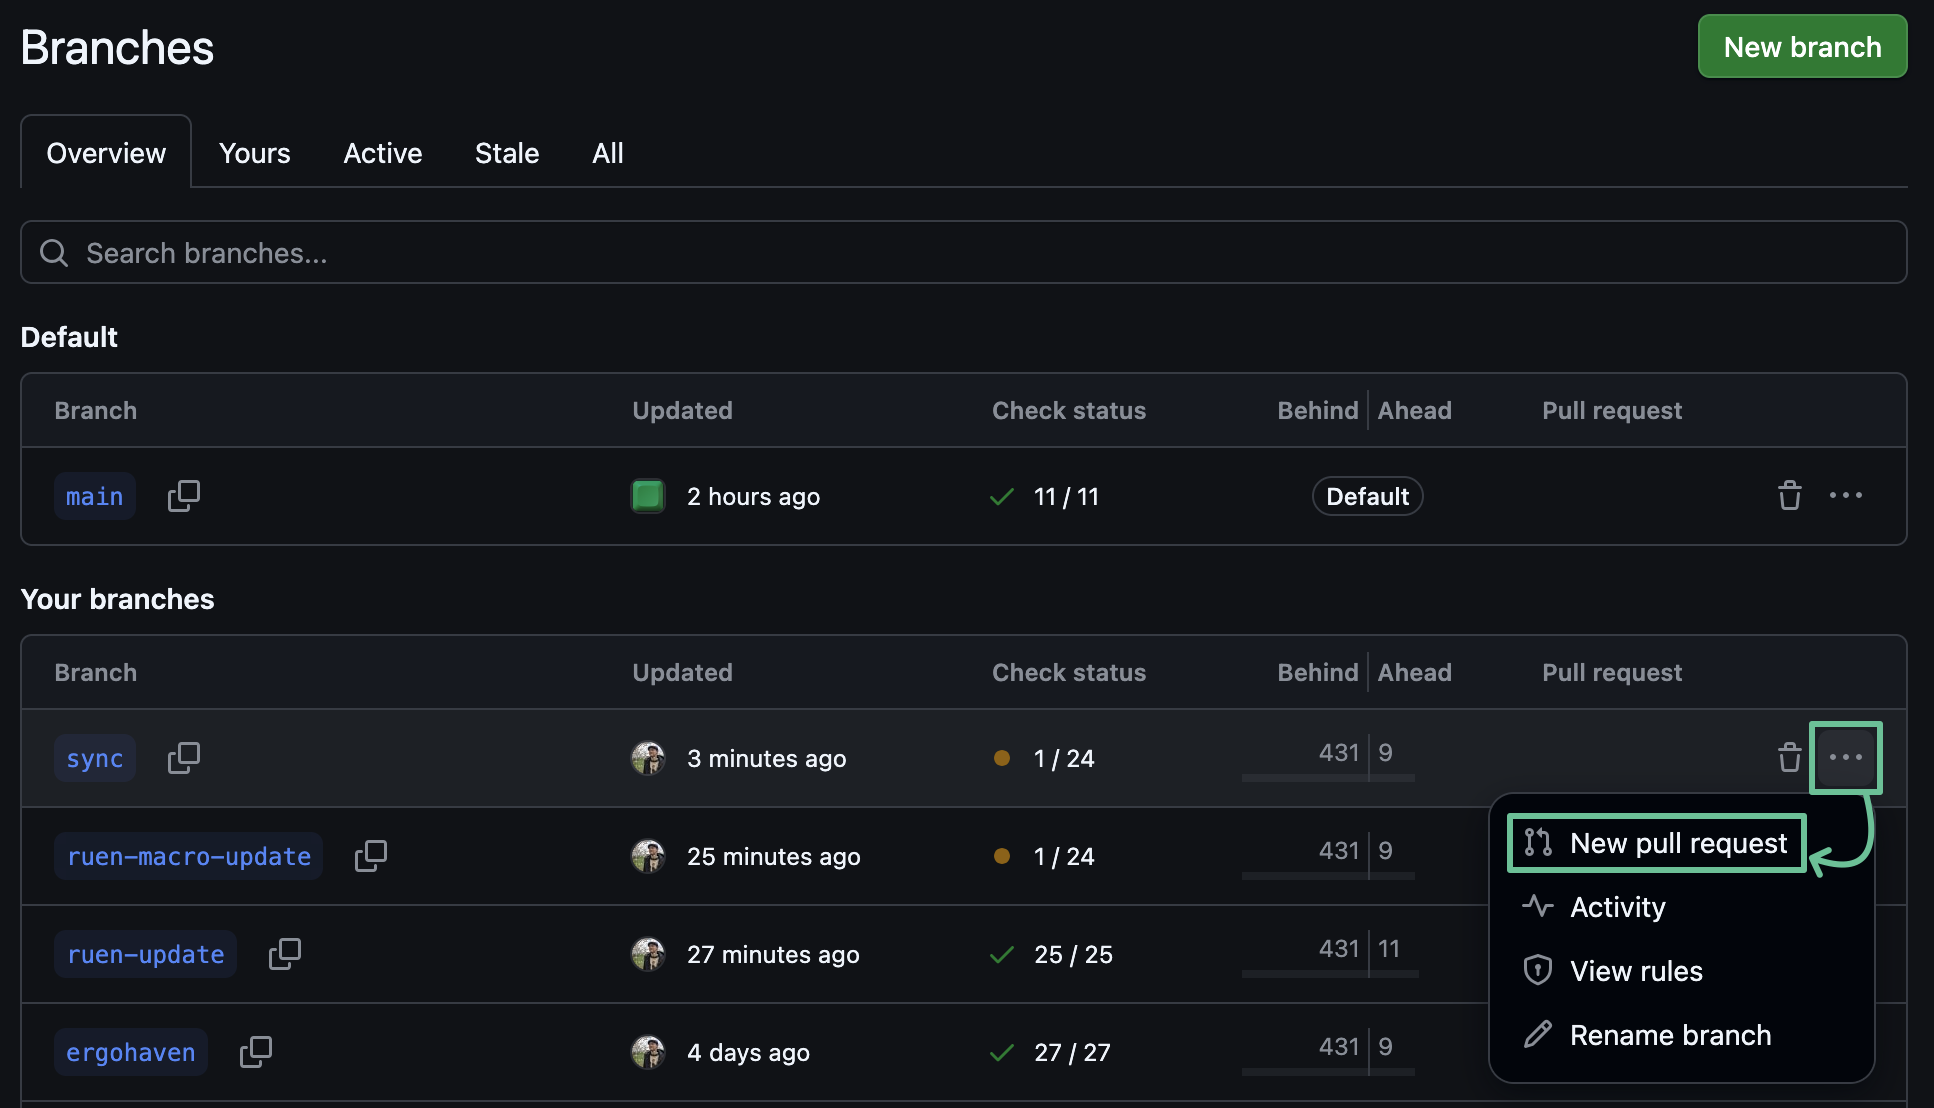
- Next, in the line of the created branch, click ••• and in the opened drop-down list select New pull request.
- Click on base repository and select the fork "{Your GitHub nickname}/ergohaven-zmk-config" in the drop-down list.
- On the opened “Comparing changes” page, click the Create pull request button.
- Depending on the number of synchronized commits, the Resolve conflicts button may not be visible immediately, scroll to it and click.
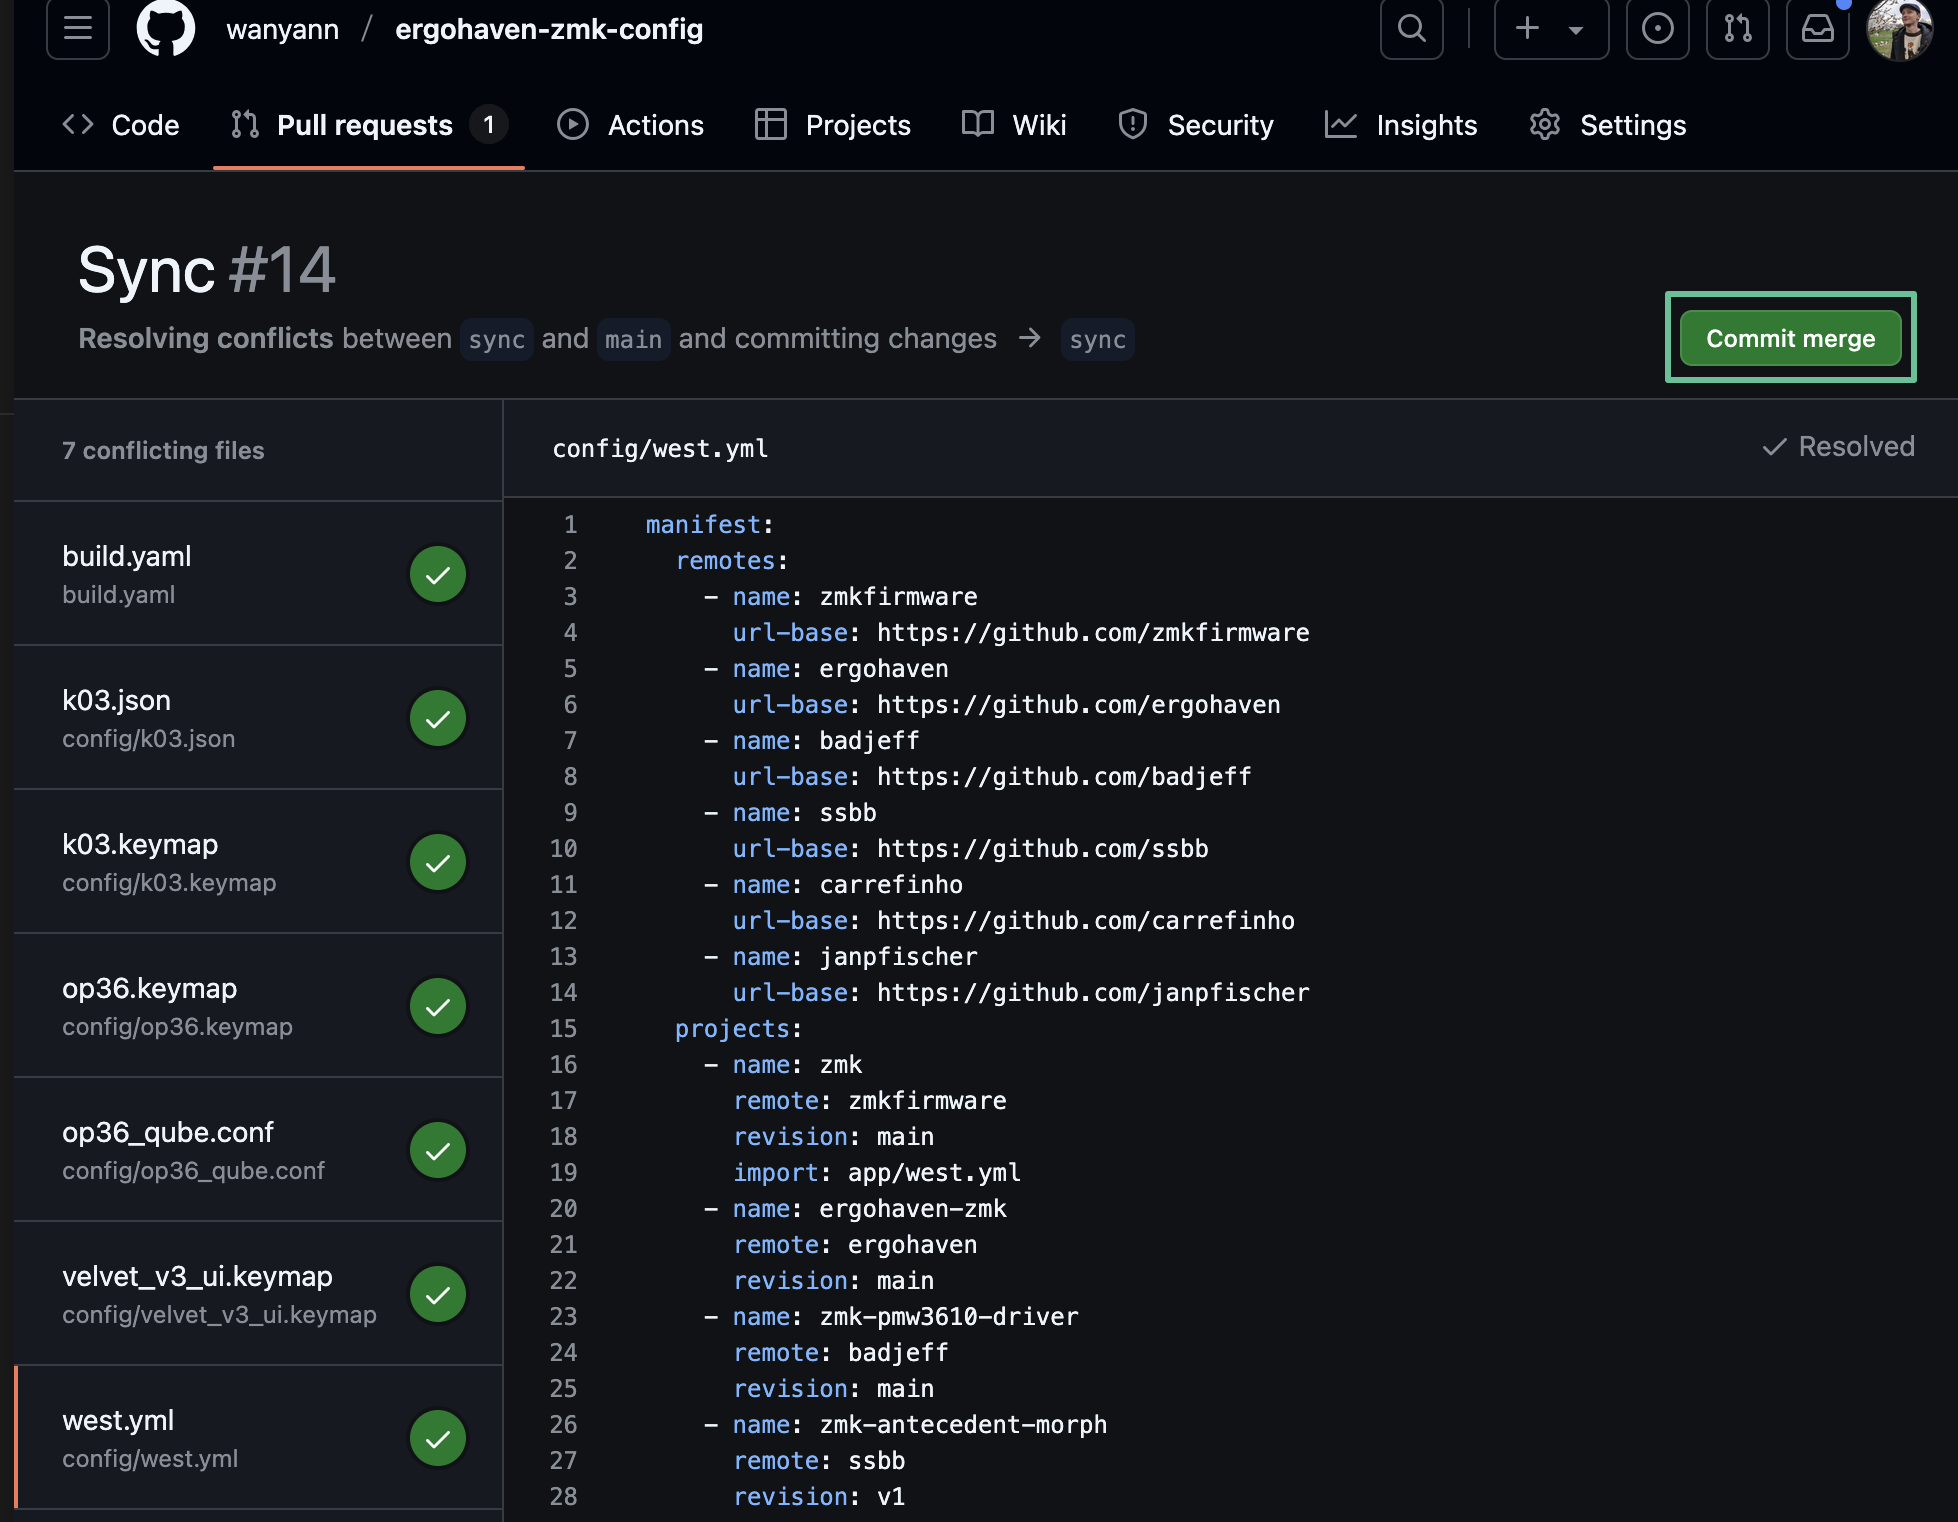
- The conflict resolution tool will open, the left side of the page displays a panel with a list of files in which conflicts need to be resolved, and the right side displays the contents of the files with marked conflict locations.
- Between
<<<<<<< sync(“sync” in this example is the name of the created branch) and=======are the changes from the main repository “ergohaven/ergohaven-zmk-config” that caused the conflict. Between=======and>>>>>>> mainare the changes you made to the layout. Next, you need to carefully consider each conflict and decide whether you want to make changes from “ergohaven/ergohaven-zmk-config” to your layout.
- If you understand that the change from the main repository is not needed, then delete the lines starting with
<<<<<<< syncand ending with=======, then scroll the file to the line>>>>>>> main, which means the end of this conflict, and also erase this line. The conflict is resolved.
- If you understand that the change from the main repository is needed, then delete the line
<<<<<<< sync, the line=======and the line>>>>>>> main, thereby adding the change from the main repository to the layout. The conflict is resolved.
- If you do not understand, or are not sure what a change from the main repository does, then seek help with resolving the conflict in the Ergohaven Community on Telegram.
- After resolving all conflicts in the file, the Mark as resolved button will become available, click it to complete the resolution of conflicts in the file.
- After resolving conflicts in all files, the Commit merge button will be displayed, click it to complete.
Scroll the page to the Merge pull request button, click it, and then click Confirm merge.
The last step to make sure that all conflicts are resolved is to go to the Actions tab and wait for the firmware build to complete. If the conflicts are resolved correctly, the firmware build will complete successfully.