Imperial44 – Wireless Edition
Imperial44 Wireless Edition is a wireless, programmable mechanical split keyboard with a hot-swap system for quick replacement of MX-compatible switches and the option to install one hot-swap encoder on each half.
Keyboard hardware
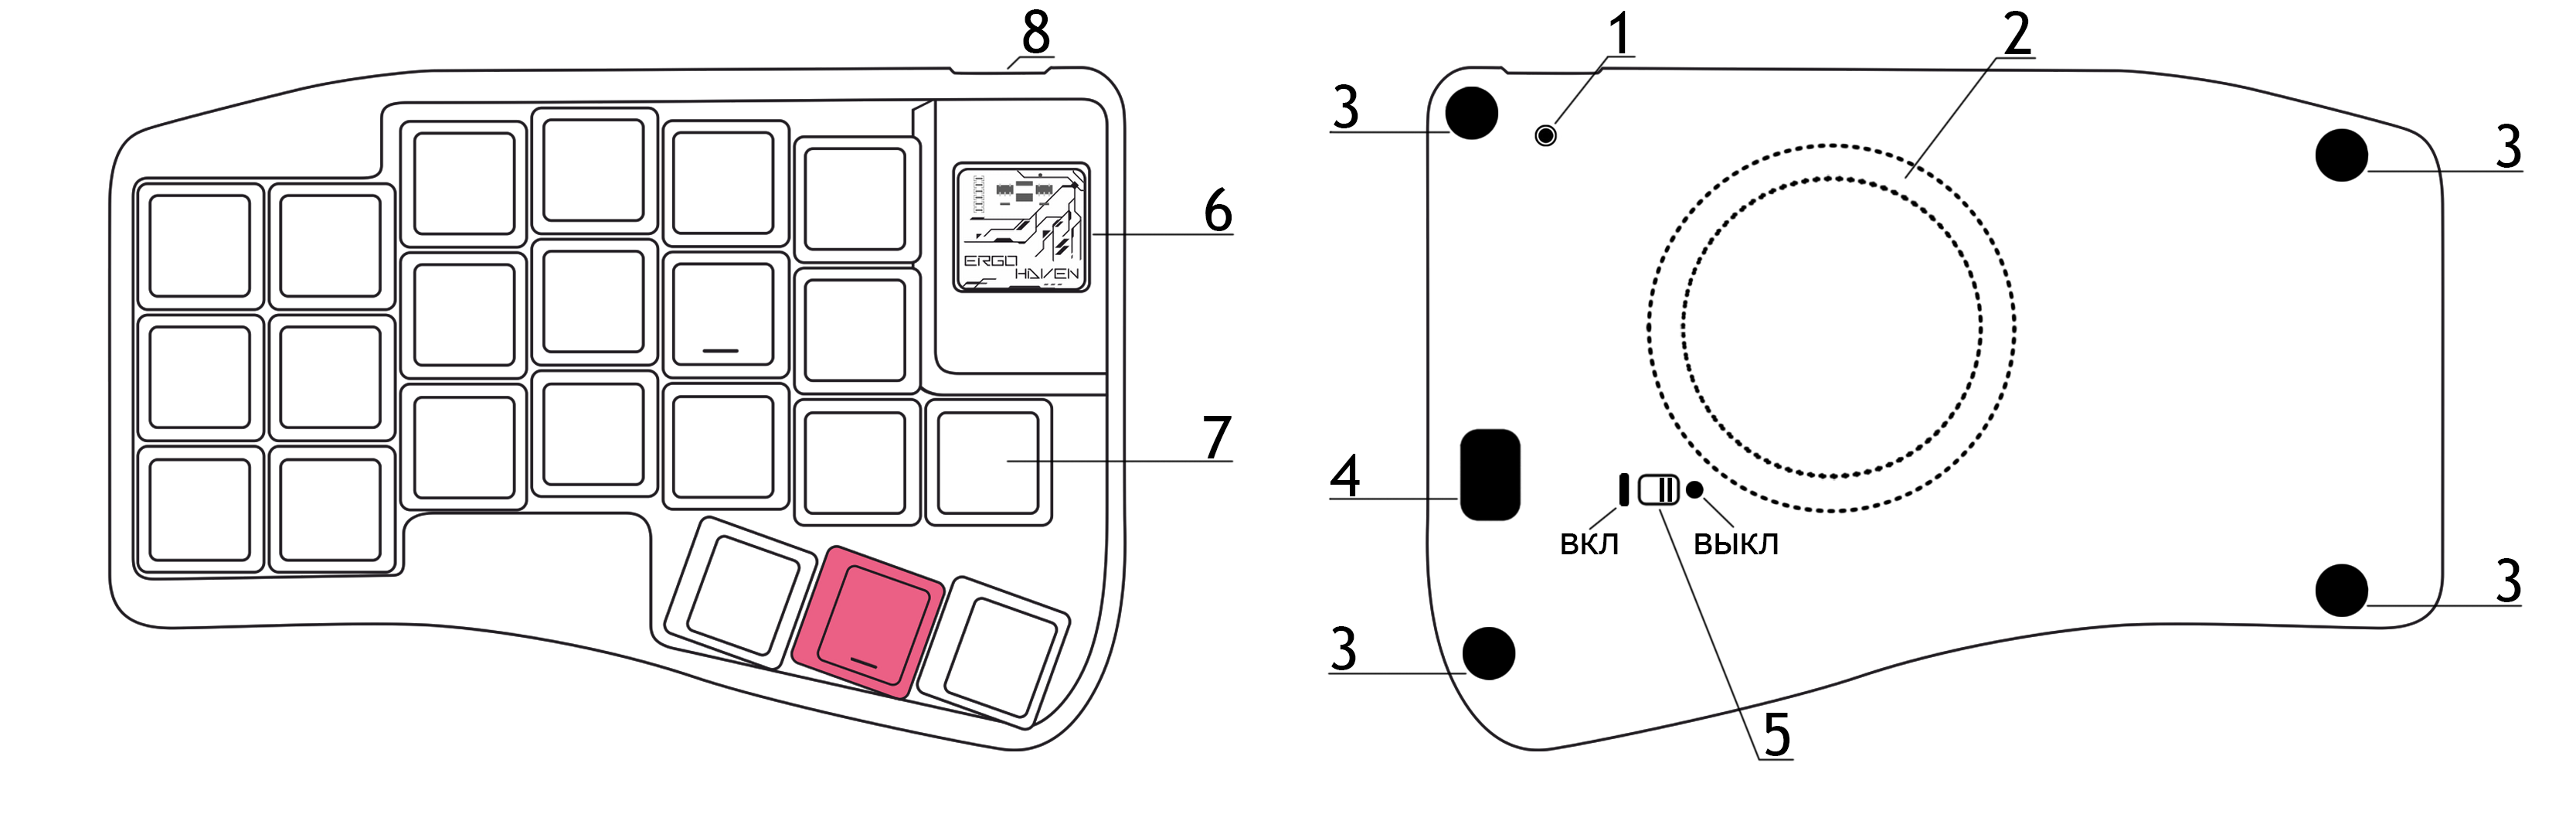
- RESET button
- Integrated MagSafe ring for WPC
- Silicone feet
- Service cutout/window for disassembling the keyboard case
- Keyboard power switch
- Transparent panel
- Slot for installing an MX switch or a hot-swap encoder
- USB‑C port
First connection
- The Imperial44 – Wireless Edition keyboard works with devices running Windows, macOS, Linux, Android, and iOS.
- The keyboard connects via Plug and Play (PnP); no additional driver installation is required.
- The keyboard ships ready to connect to your device with the firmware version current at the time of purchase.
Direct connection (without Ergohaven’s Qube)
- Turn on power on the left and right halves of the keyboard — the halves are already synchronized with each other.
- Select a connection profile on the keyboard — if you’re connecting to only one device for the first time, you can skip this step.
- Connect the keyboard to your device — enable Bluetooth on the device, then complete pairing in the device settings.
Connection via Ergohaven’s Qube
Ergohaven’s Qube is a universal dongle for Ergohaven wireless keyboards that displays useful information and reduces the keyboard’s power consumption.
- Connect Ergohaven’s Qube to your computer using a USB Type‑C cable and wait for Qube to boot.
- Turn on power on the left half of the keyboard — it will connect to Qube automatically.
- Turn on power on the right half — it will also connect to Qube, completing the setup.
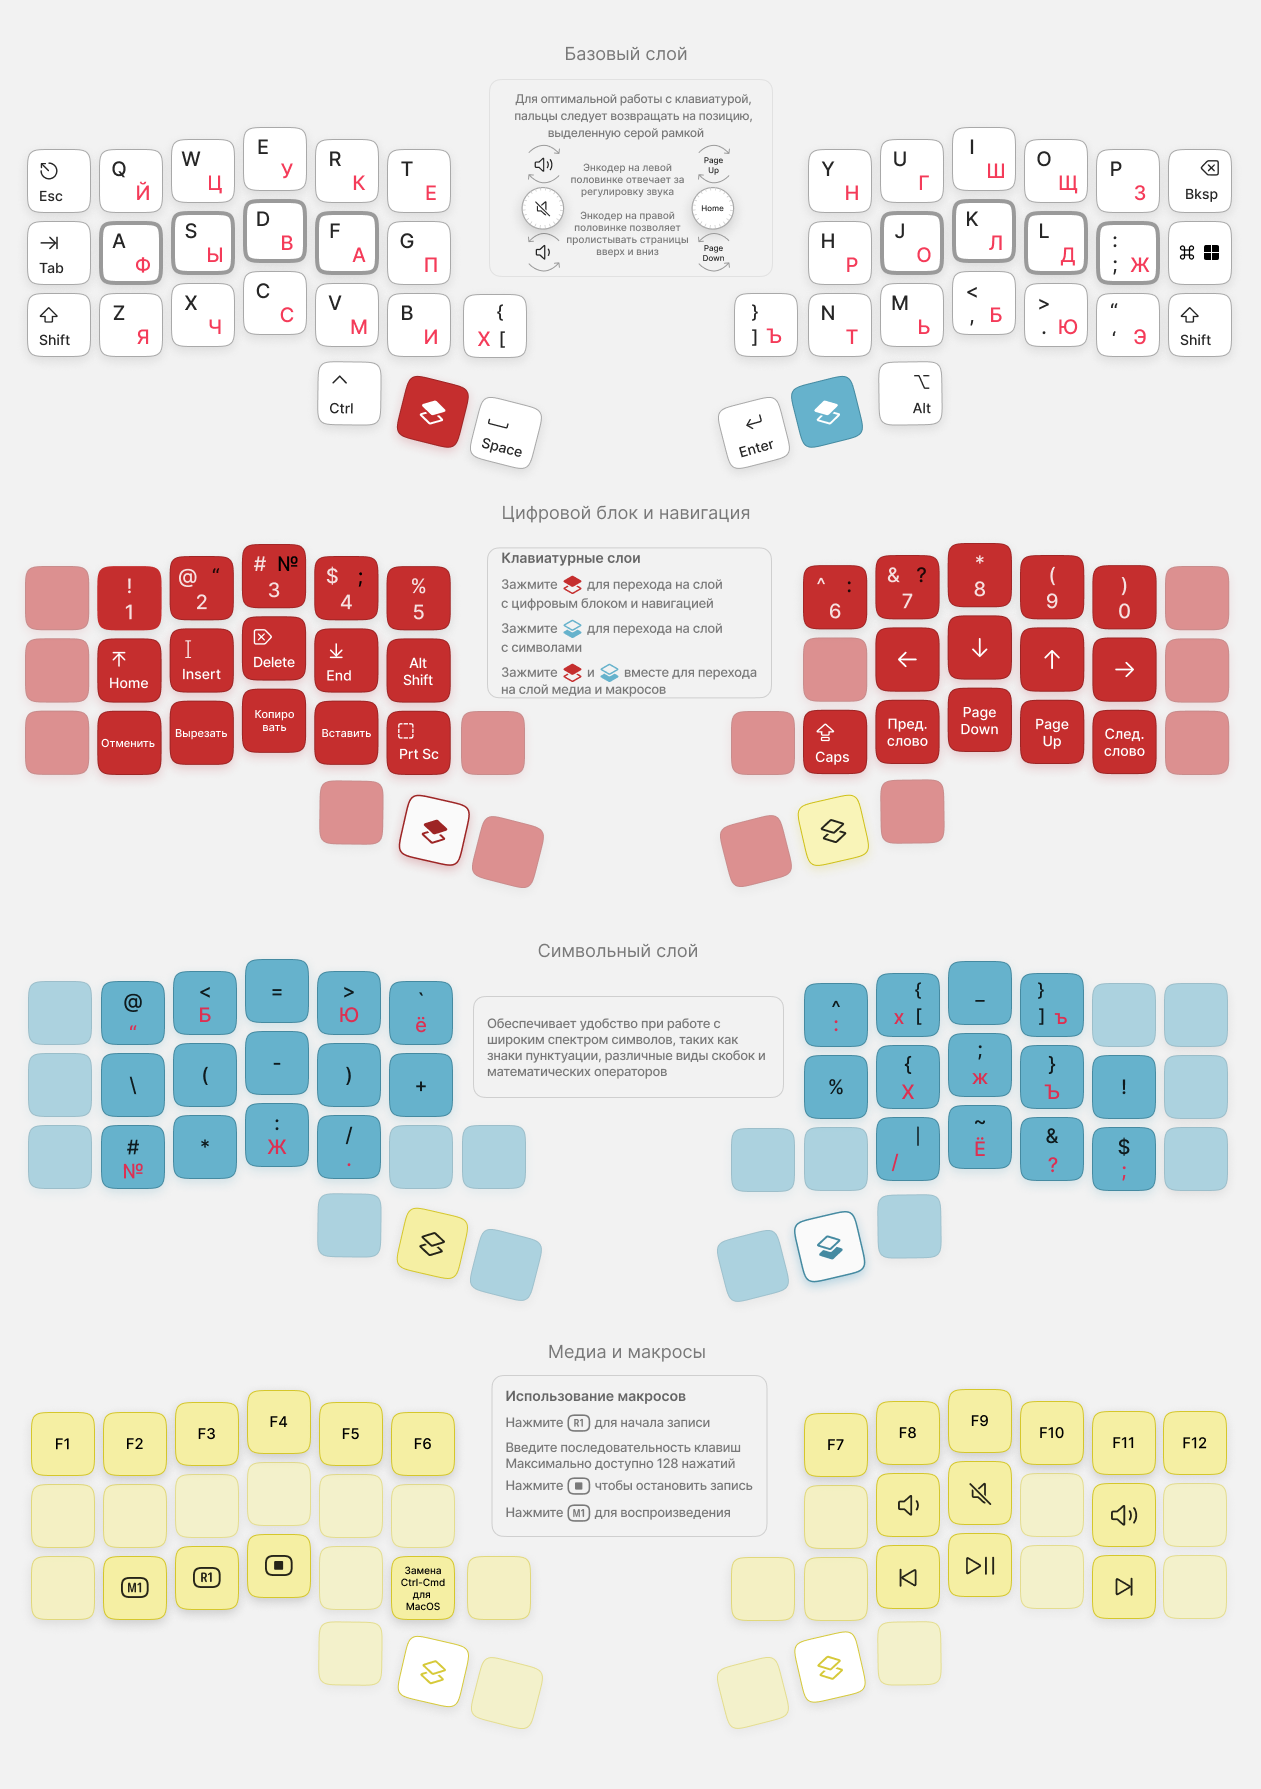
Keyboard configuration
Please refer to the article Keyboard configuration in ZMK keymap-editor.
RuEn mode
Please refer to the article RuEn layout for wireless keyboards.
Firmware update
Firmware for a keyboard without Ergohaven’s Qube
Download the settings reset firmware and the latest firmware for the left and right halves.
Turn off both halves using the switch on the back of the keyboard.
- Connect the USB power cable to the left half, then press the Reset button on the back of the keyboard twice.
- Wait until the controller enters bootloader mode and a mass-storage drive opens (if autorun for removable drives is disabled on your device, open the drive manually).
- Copy or drag-and-drop the UF2 file with the “settings reset” firmware; the controller should reboot immediately.
The reset firmware is used to wipe the keyboard’s internal memory. It resets connection profiles and half synchronization settings.
- Press the Reset button on the back of the keyboard twice again and wait until the controller enters bootloader mode (the mass-storage drive opens).
- Copy or drag-and-drop the UF2 firmware file for the left half; the controller should reboot immediately.
Repeat steps 1–5 for the right half.
Turn on both halves using the switch on the back of the keyboard.
Press and release the Reset buttons on both halves at the same time — this will synchronize the halves with each other.
Connect the keyboard to your device.
Firmware for a keyboard with Ergohaven’s Qube
Download the settings reset firmware and the latest firmware for Qube, the left half, and the right half.
Turn off both halves using the switch on the back of the keyboard.
Connect the USB power cable to Qube, then press the Reset button on the back of Qube twice.
Wait until the controller enters bootloader mode and a mass-storage drive opens (if autorun for removable drives is disabled on your device, open the drive manually).
Copy or drag-and-drop the UF2 file with the “settings reset” firmware; the controller should reboot immediately.
The reset firmware is used to wipe Qube’s and the keyboard’s internal memory. It resets half-to-half synchronization and Qube pairing settings.
- Press the Reset button on the back of Qube twice again and wait until the controller enters bootloader mode (the mass-storage drive opens).
- Copy or drag-and-drop the UF2 firmware file for Qube; the controller should reboot immediately.
- Connect the USB power cable to the left half, then press the Reset button on the back of the keyboard twice.
- Wait until the controller enters bootloader mode and a mass-storage drive opens (if autorun for removable drives is disabled on your device, open the drive manually).
- Copy or drag-and-drop the UF2 file with the “settings reset” firmware; the controller should reboot immediately.
- Press the Reset button on the back of the keyboard twice again and wait until the controller enters bootloader mode (the mass-storage drive opens).
- Copy or drag-and-drop the UF2 firmware file for the left half; the controller should reboot immediately.
- Repeat steps 1–5 for the right half.
- Connect Qube to your device and wait for Qube to boot.
- Turn on the left half using the switch on the back of the keyboard and wait for it to sync with Qube.
It is important to follow the left-then-right connection order when pairing to Qube, because Qube synchronizes sequentially: first with the left half, then with the right half.
- Turn on the right half using the switch on the back of the keyboard and wait for it to sync with Qube.