Macropad
Macropad is a wired, programmable mechanical macropad with an encoder and a hot-swap system for quick replacement of MX-compatible switches.
Macropad hardware
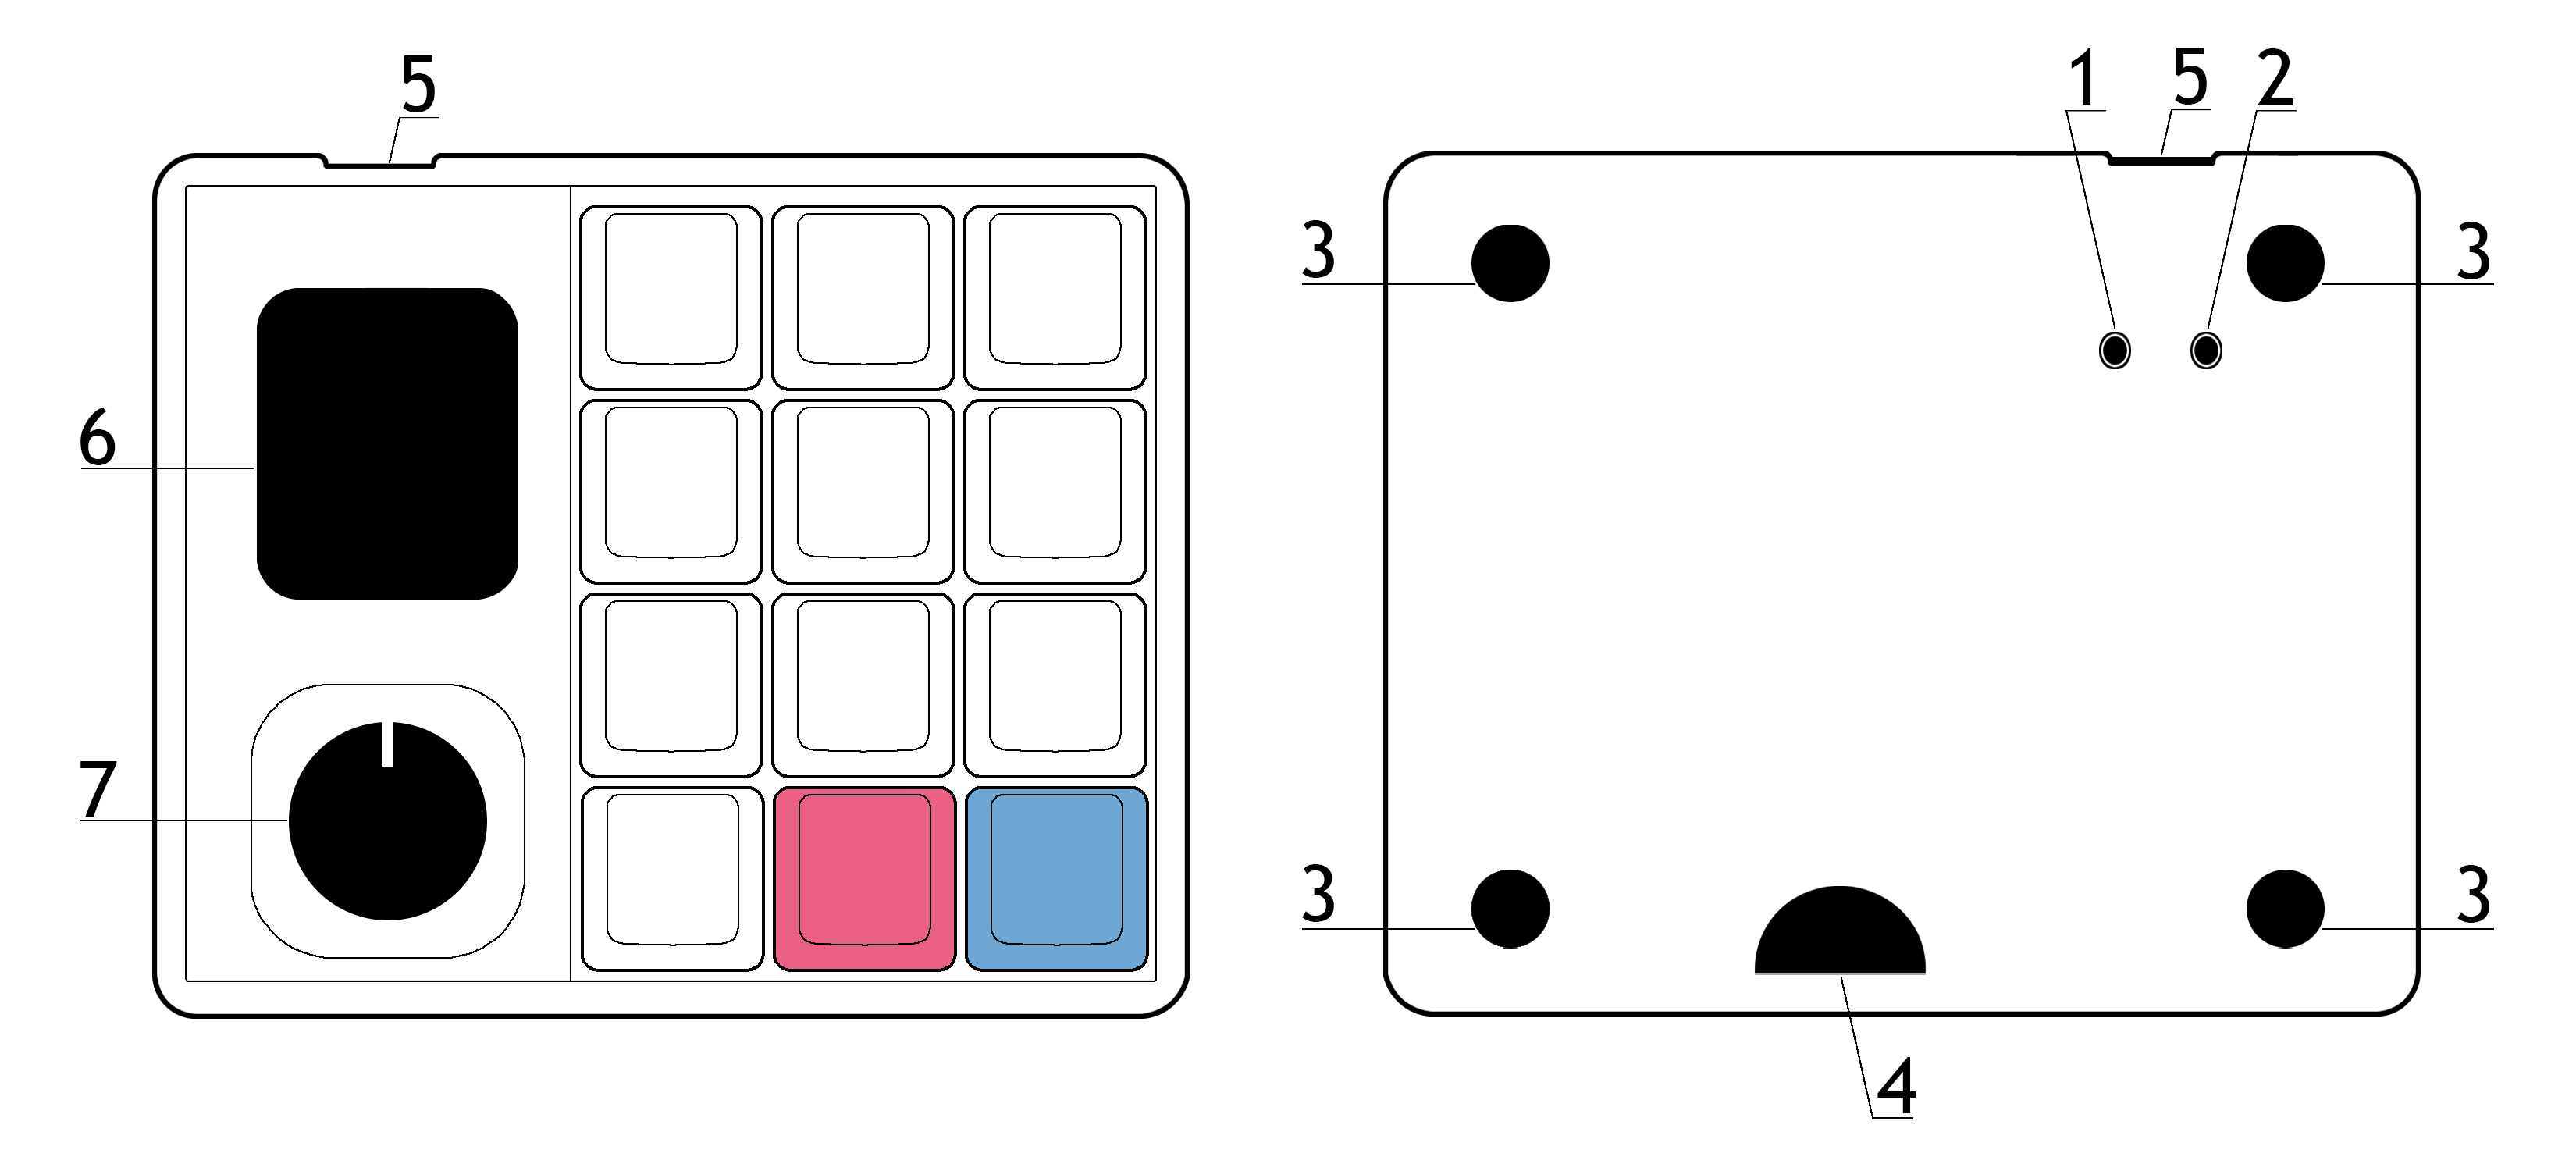
Macropad v3

- RESET button
- BOOT button
- Silicone feet
- Service cutout/window for disassembling the macropad case
- USB‑C port
- 240×280 IPS display
- Encoder
Macropad v2
- BOOT button
- RESET button
- Silicone feet
- Service cutout/window for disassembling the macropad case
- USB‑C port
- 240×280 IPS display
- Encoder
Connection
- The macropad works with devices running Windows, macOS, Linux, Android, and iOS.
- The macropad connects via Plug and Play (PnP); no additional driver installation is required.
- When connecting to a device, make sure the USB‑C cable is firmly inserted into the macropad’s port.
Macropad setup
Please refer to the Vial software article.
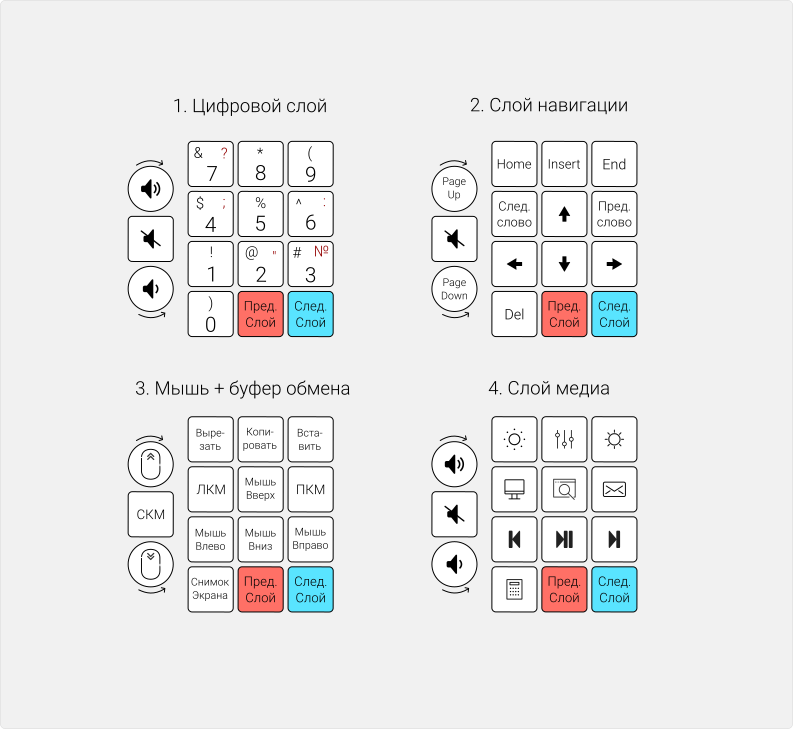
Macropad v3 — RGB lighting setup in Vial
In Vial, you can customize key lighting in the Lighting tab by changing the effect, color, brightness, and animation speed.
Macropad v1 and v2 do not have RGB lighting!
- RGB Effect - choose different animations or a static color
- RGB Color - set the backlight color
- RGB Brightness - adjust backlight brightness
- RGB Speed - adjust animation speed After setting all RGB parameters, click “Save” in the bottom-right corner of Vial to apply and save the changes.
Firmware update
The firmware version must match your macropad version, otherwise the macropad may work incorrectly.
Preparation
- Download the latest firmware for your macropad version here.
- Save your layout in Vial: “File” > “Save current layout”.
Installation
To reflash/update the macropad firmware, you need to put it into bootloader mode. You can do this in several ways (choose one):
Bootmagic:
- Hold the top-left key (key 9 in the default layout) and connect the USB power cable.
- Wait until the controller enters bootloader mode and a mass-storage drive opens.
Using the RESET button:
- Connect the USB power cable and quickly press the RESET button twice on the bottom of the macropad.
- Wait until the controller enters bootloader mode and a mass-storage drive opens.
Using the BOOT button:
- Hold the BOOT button on the bottom of the macropad and connect the USB power cable.
- Wait until the controller enters bootloader mode and a mass-storage drive opens.
- Copy or drag-and-drop the UF2 file; the controller should reboot immediately and start working in normal mode.
- Import your layout into Vial: “File” > “Load saved layout”.