Phenom Series
Phenom
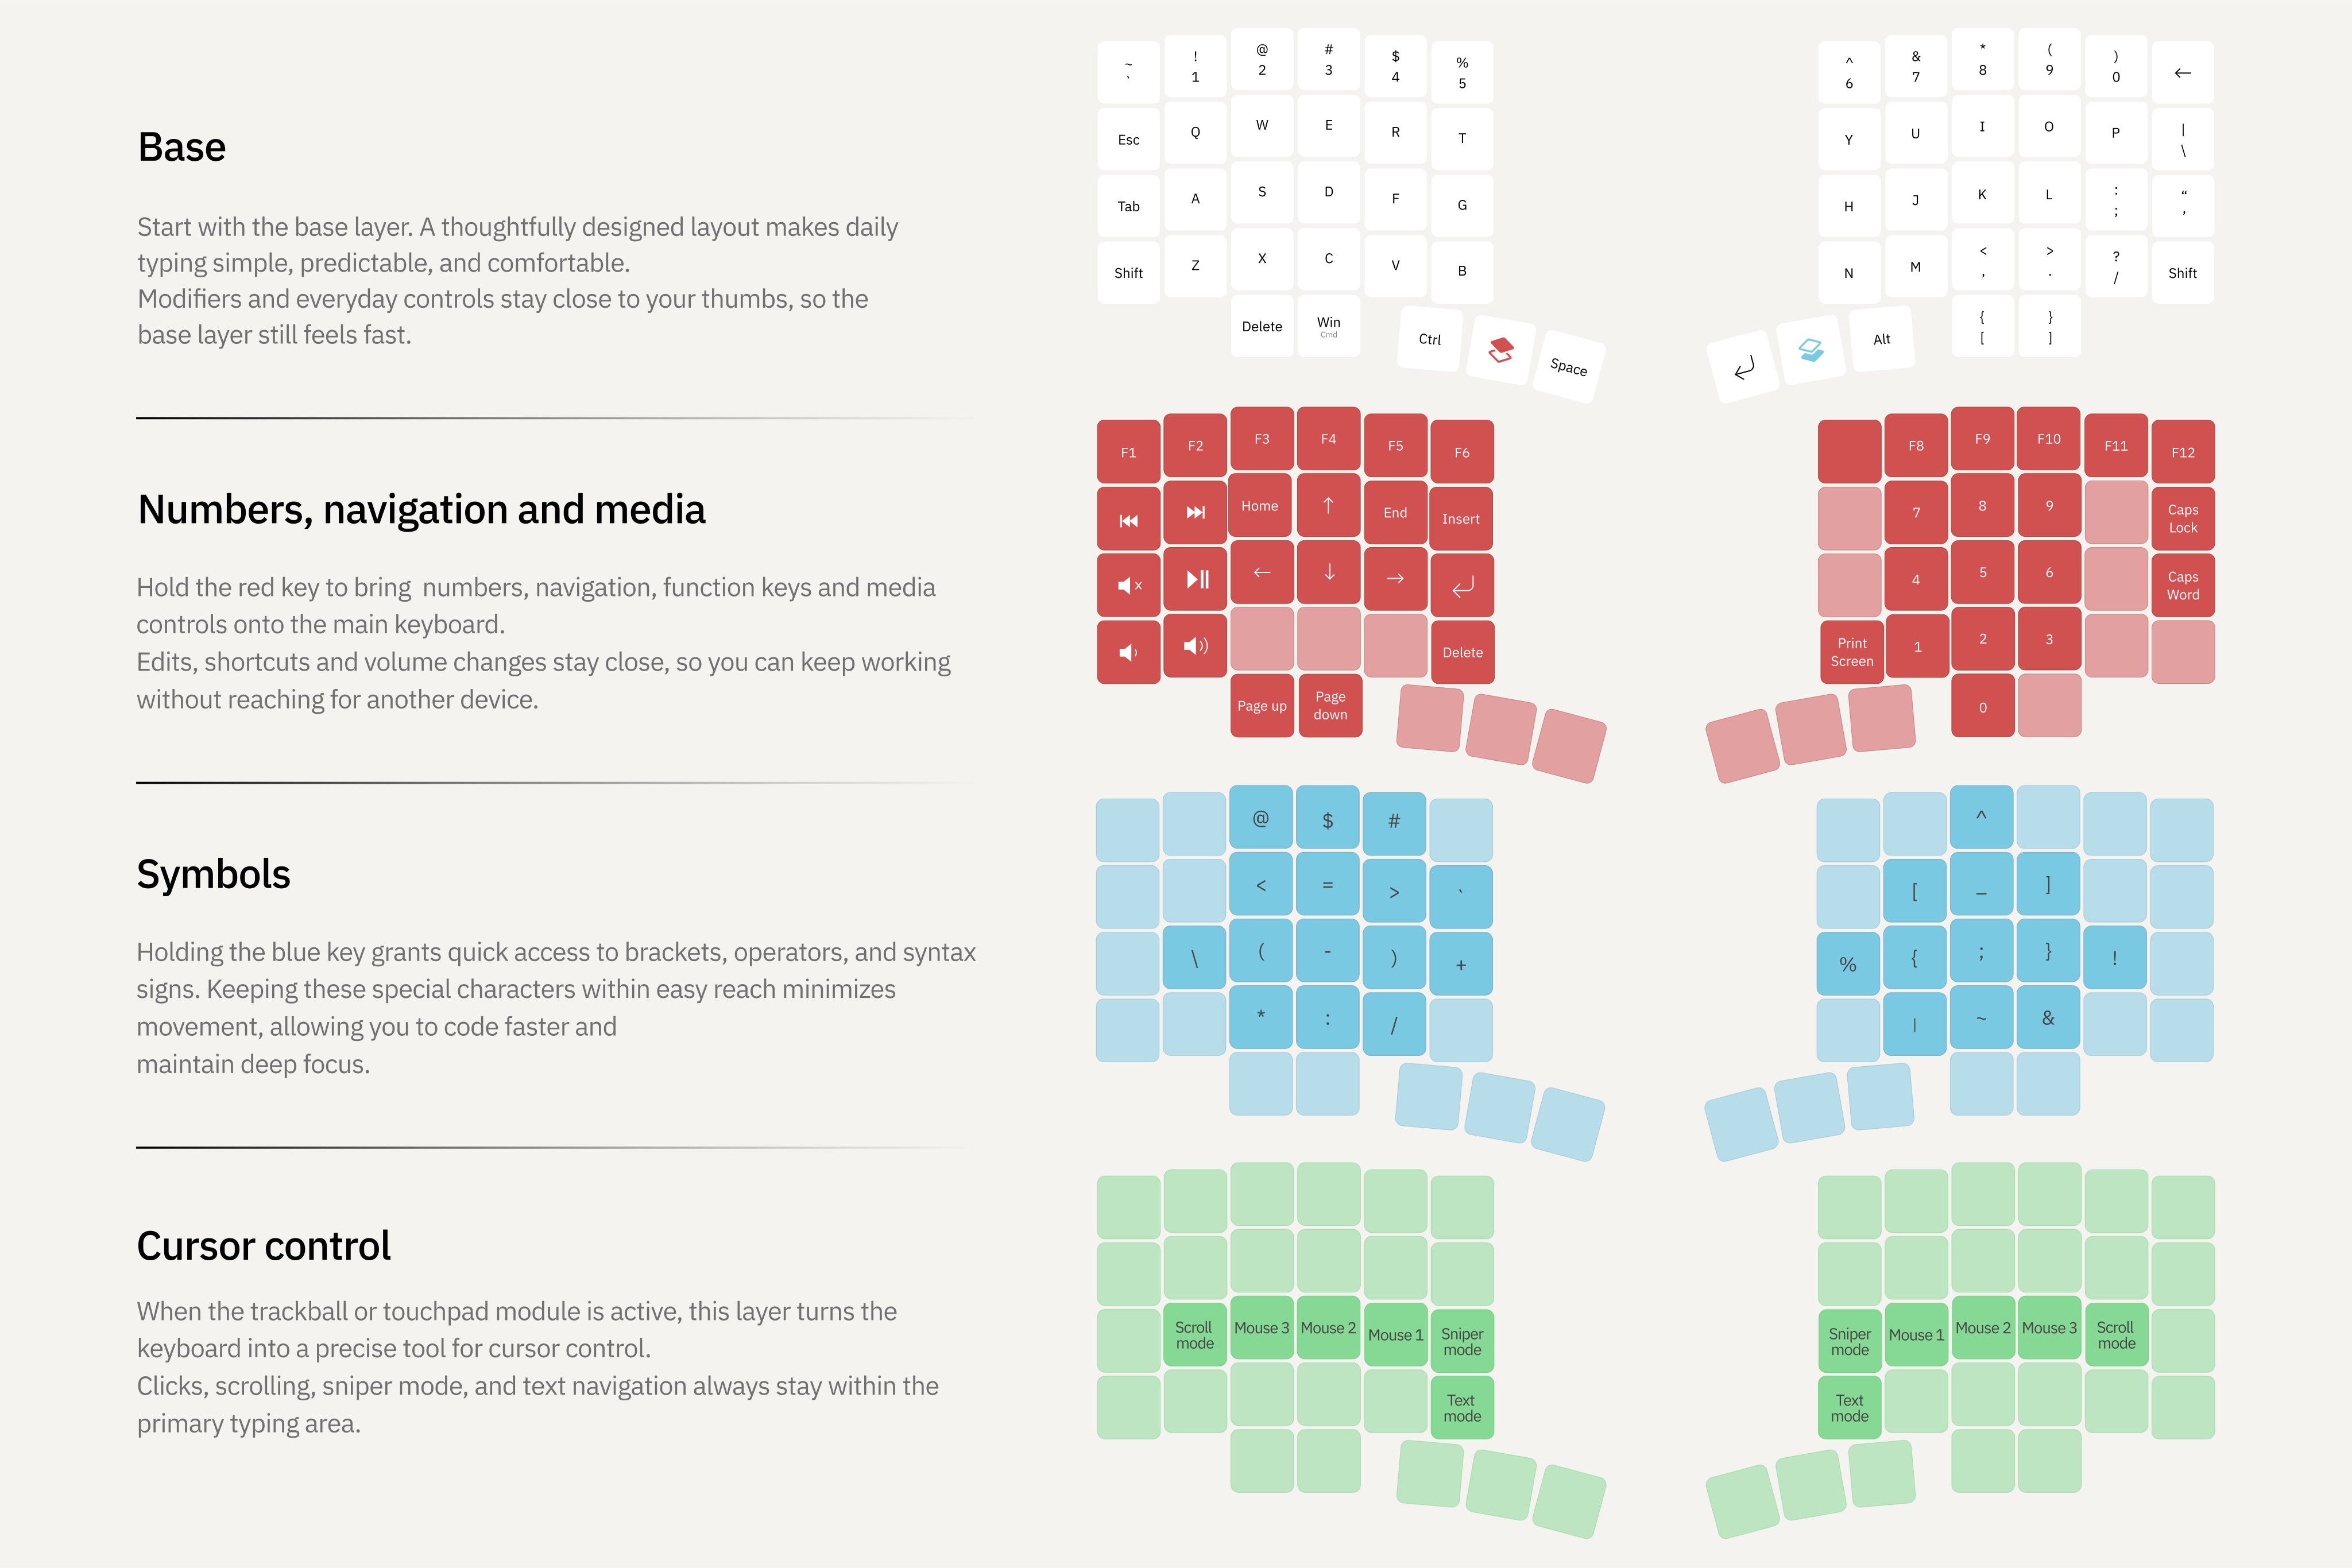
Phenom is an ergonomic programmable split keyboard with a 3D case, a modular hot-swap system, 58 customizable keys, and support for a trackball, touchpad, or encoder on either half
Phenom Mini
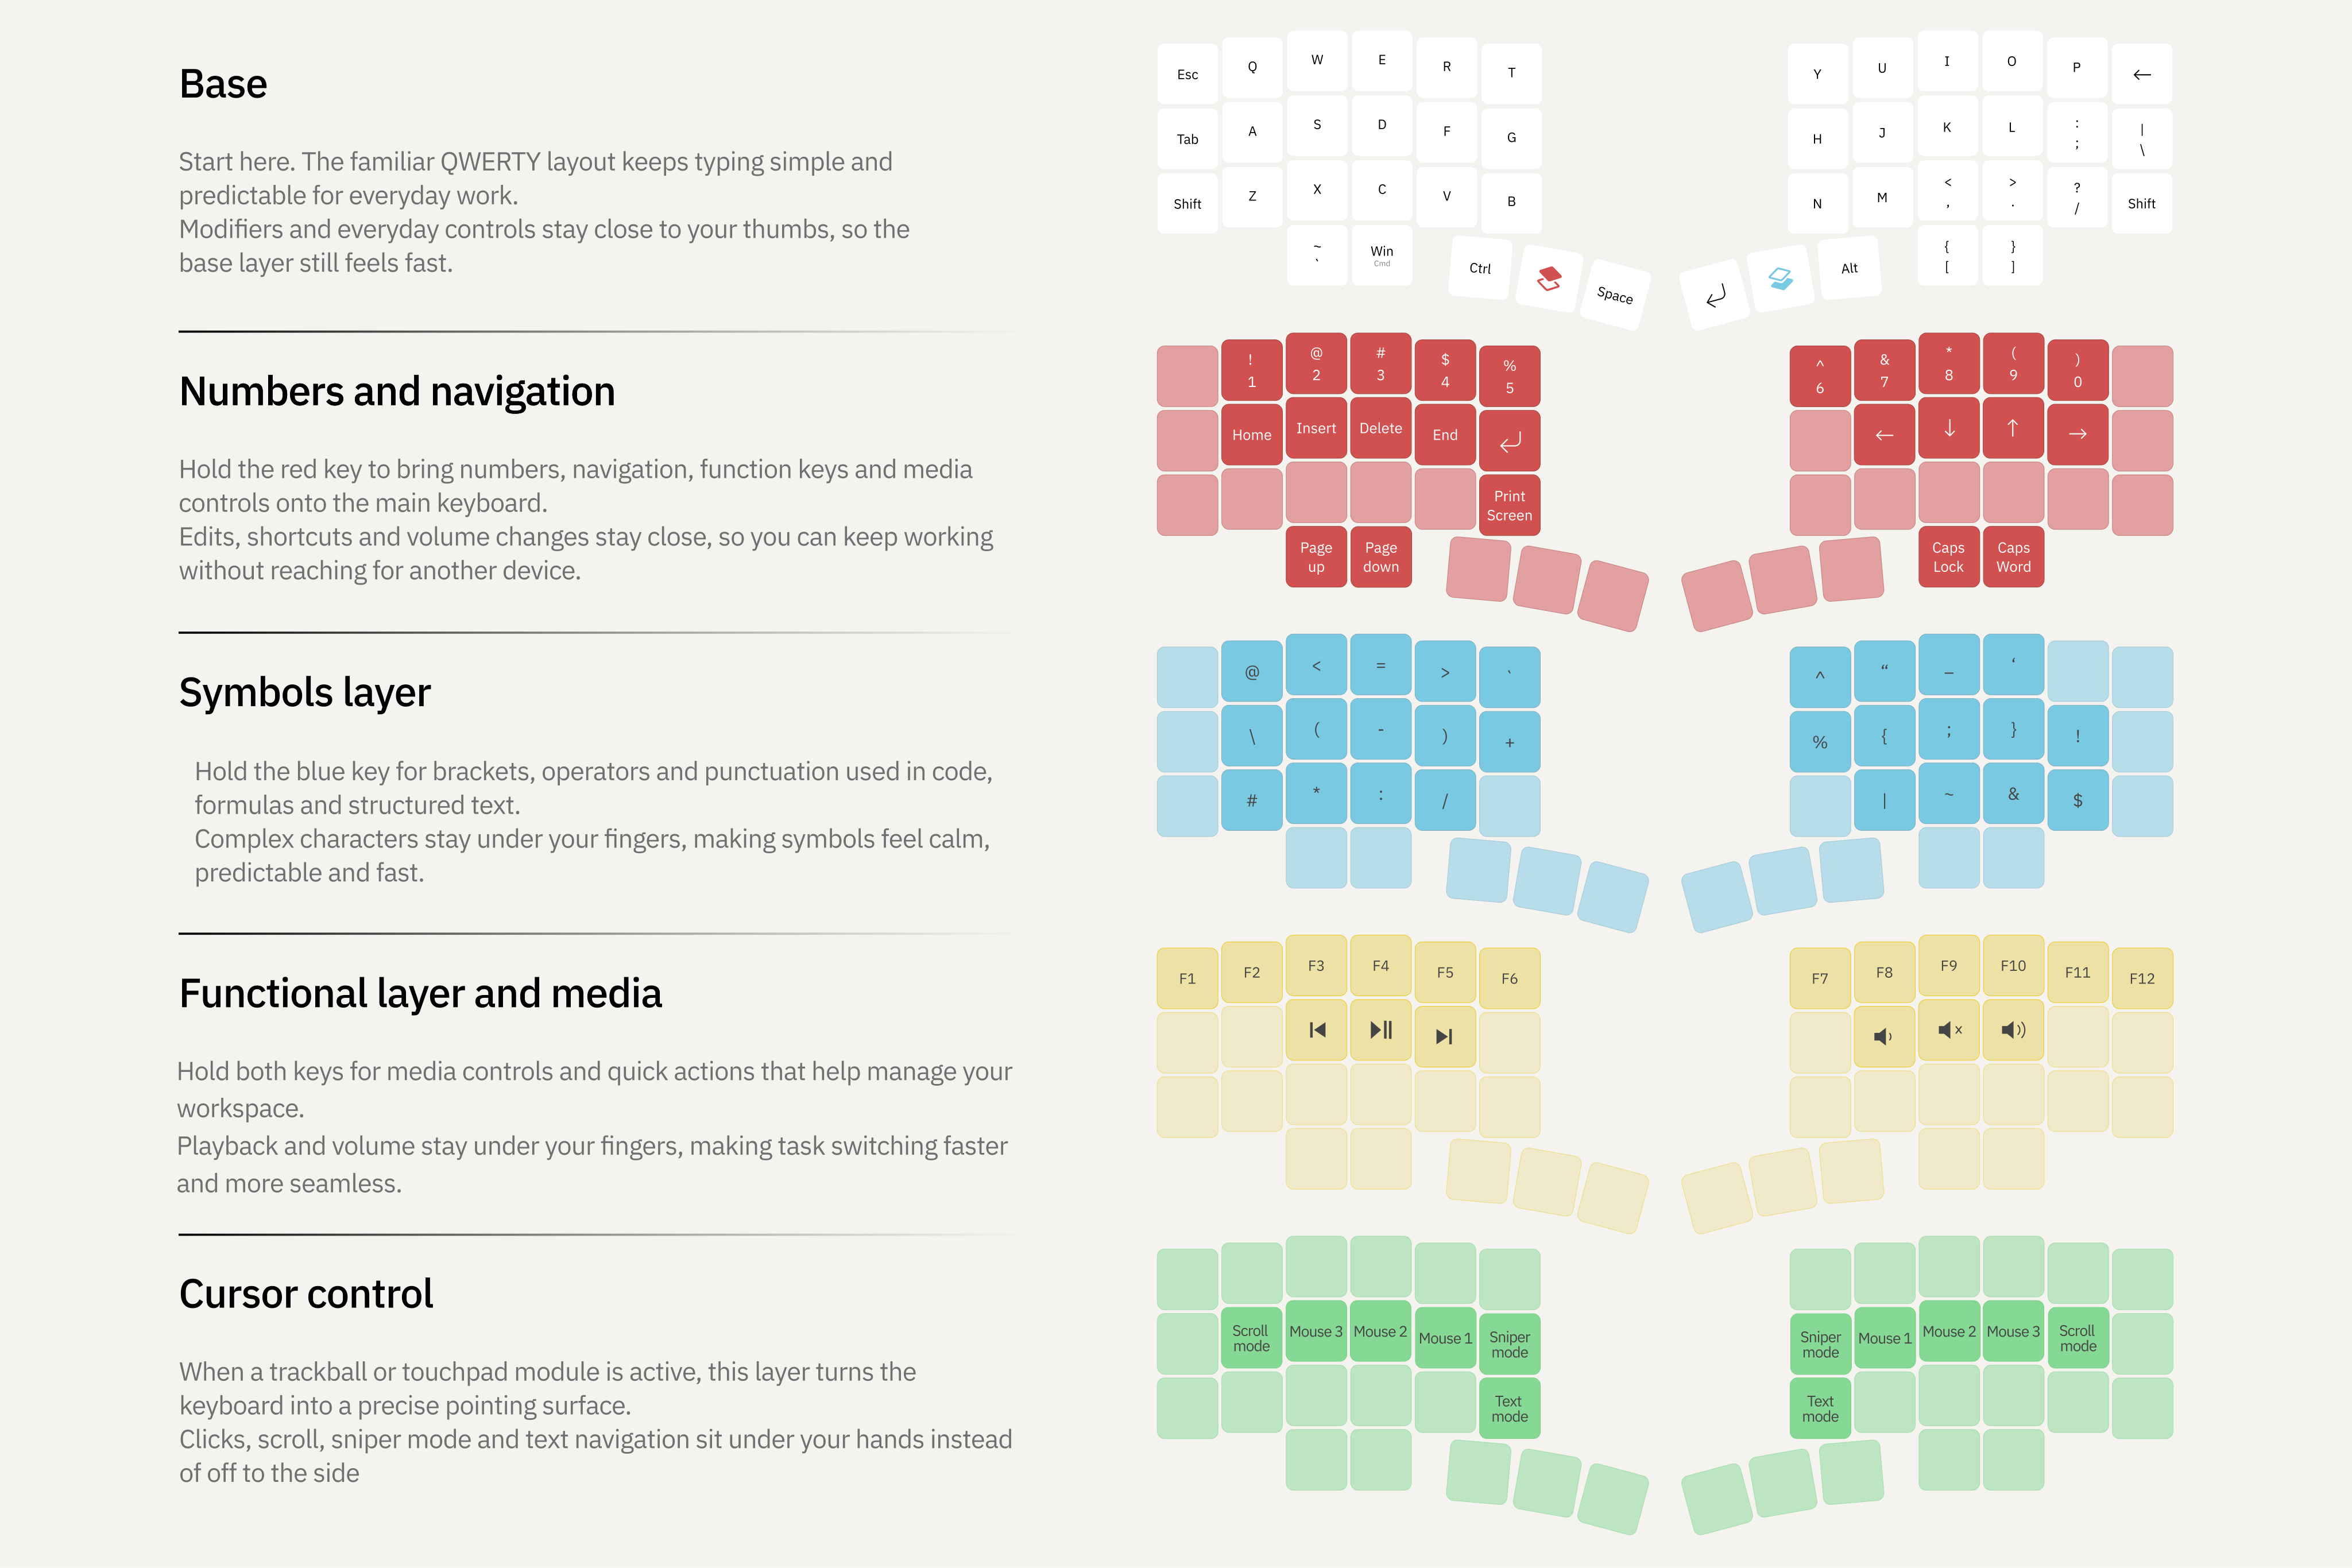
Phenom Mini is a compact version of the ergonomic Phenom split keyboard with 46 customizable keys and support for a trackball, touchpad, or encoder on either half
Phenom Micro
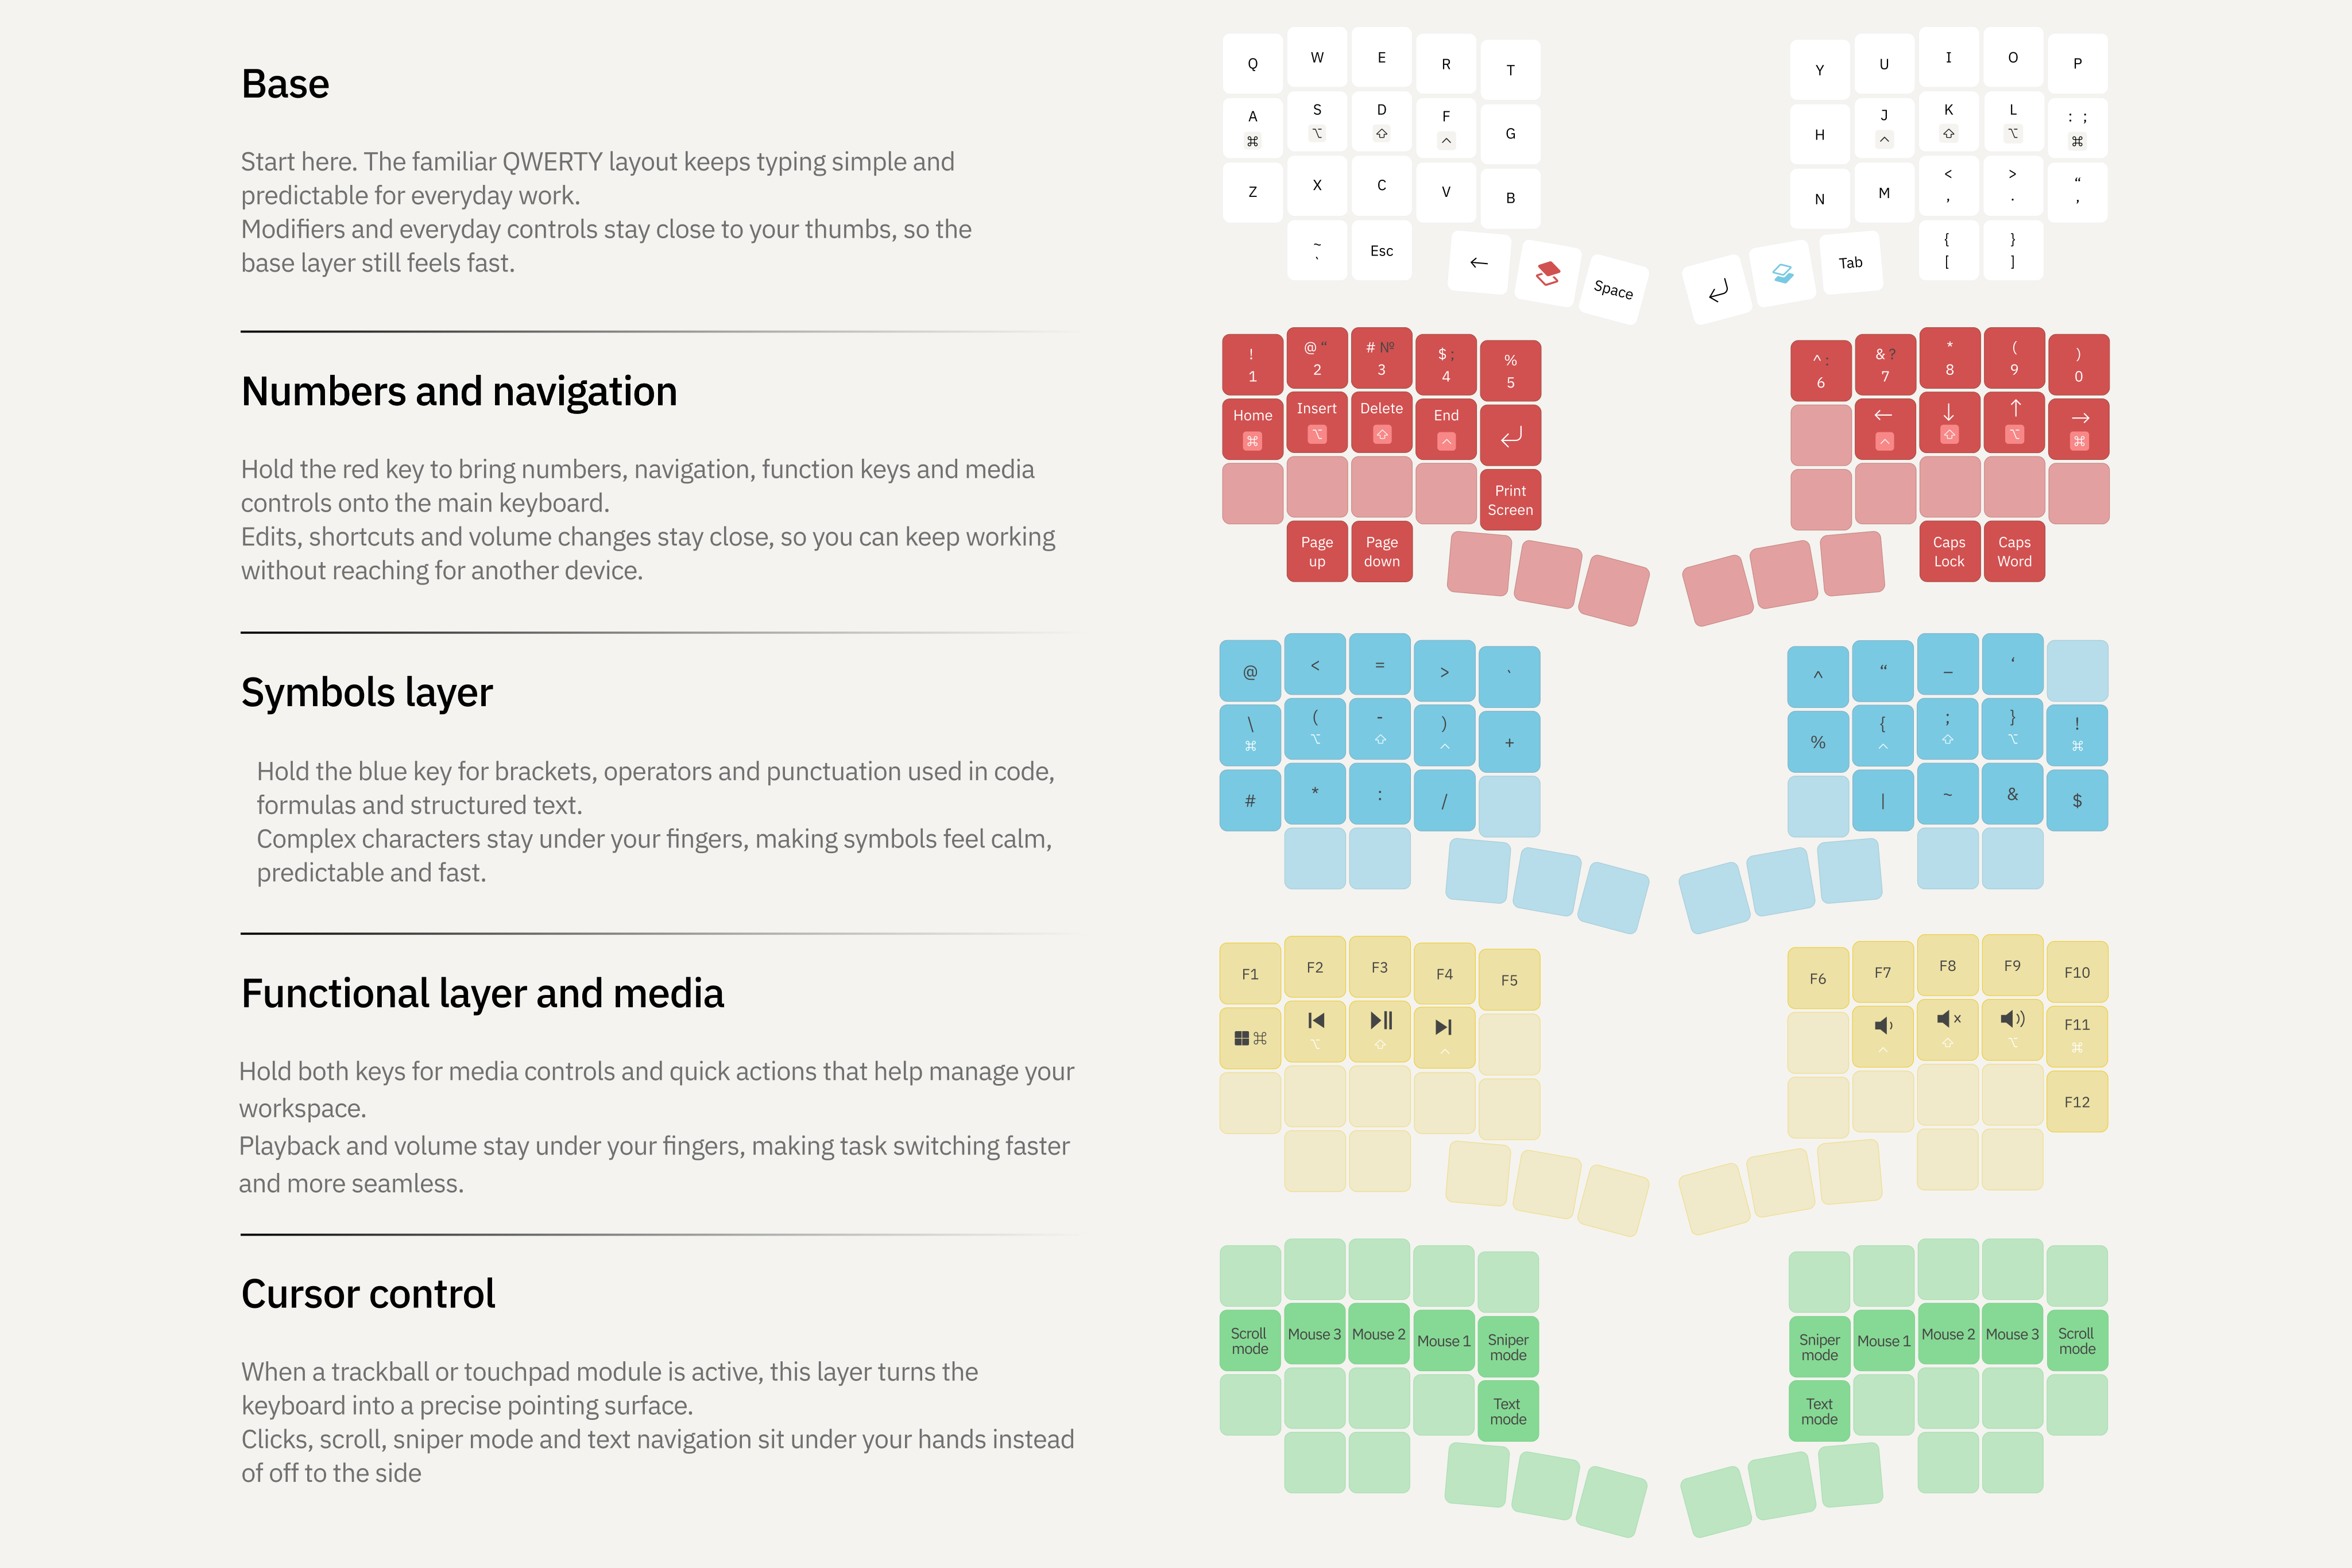
Phenom Micro is an ultra-compact version of the Phenom keyboard, with only 40 customizable keys and support for a trackball, touchpad, or encoder on either half
Overview
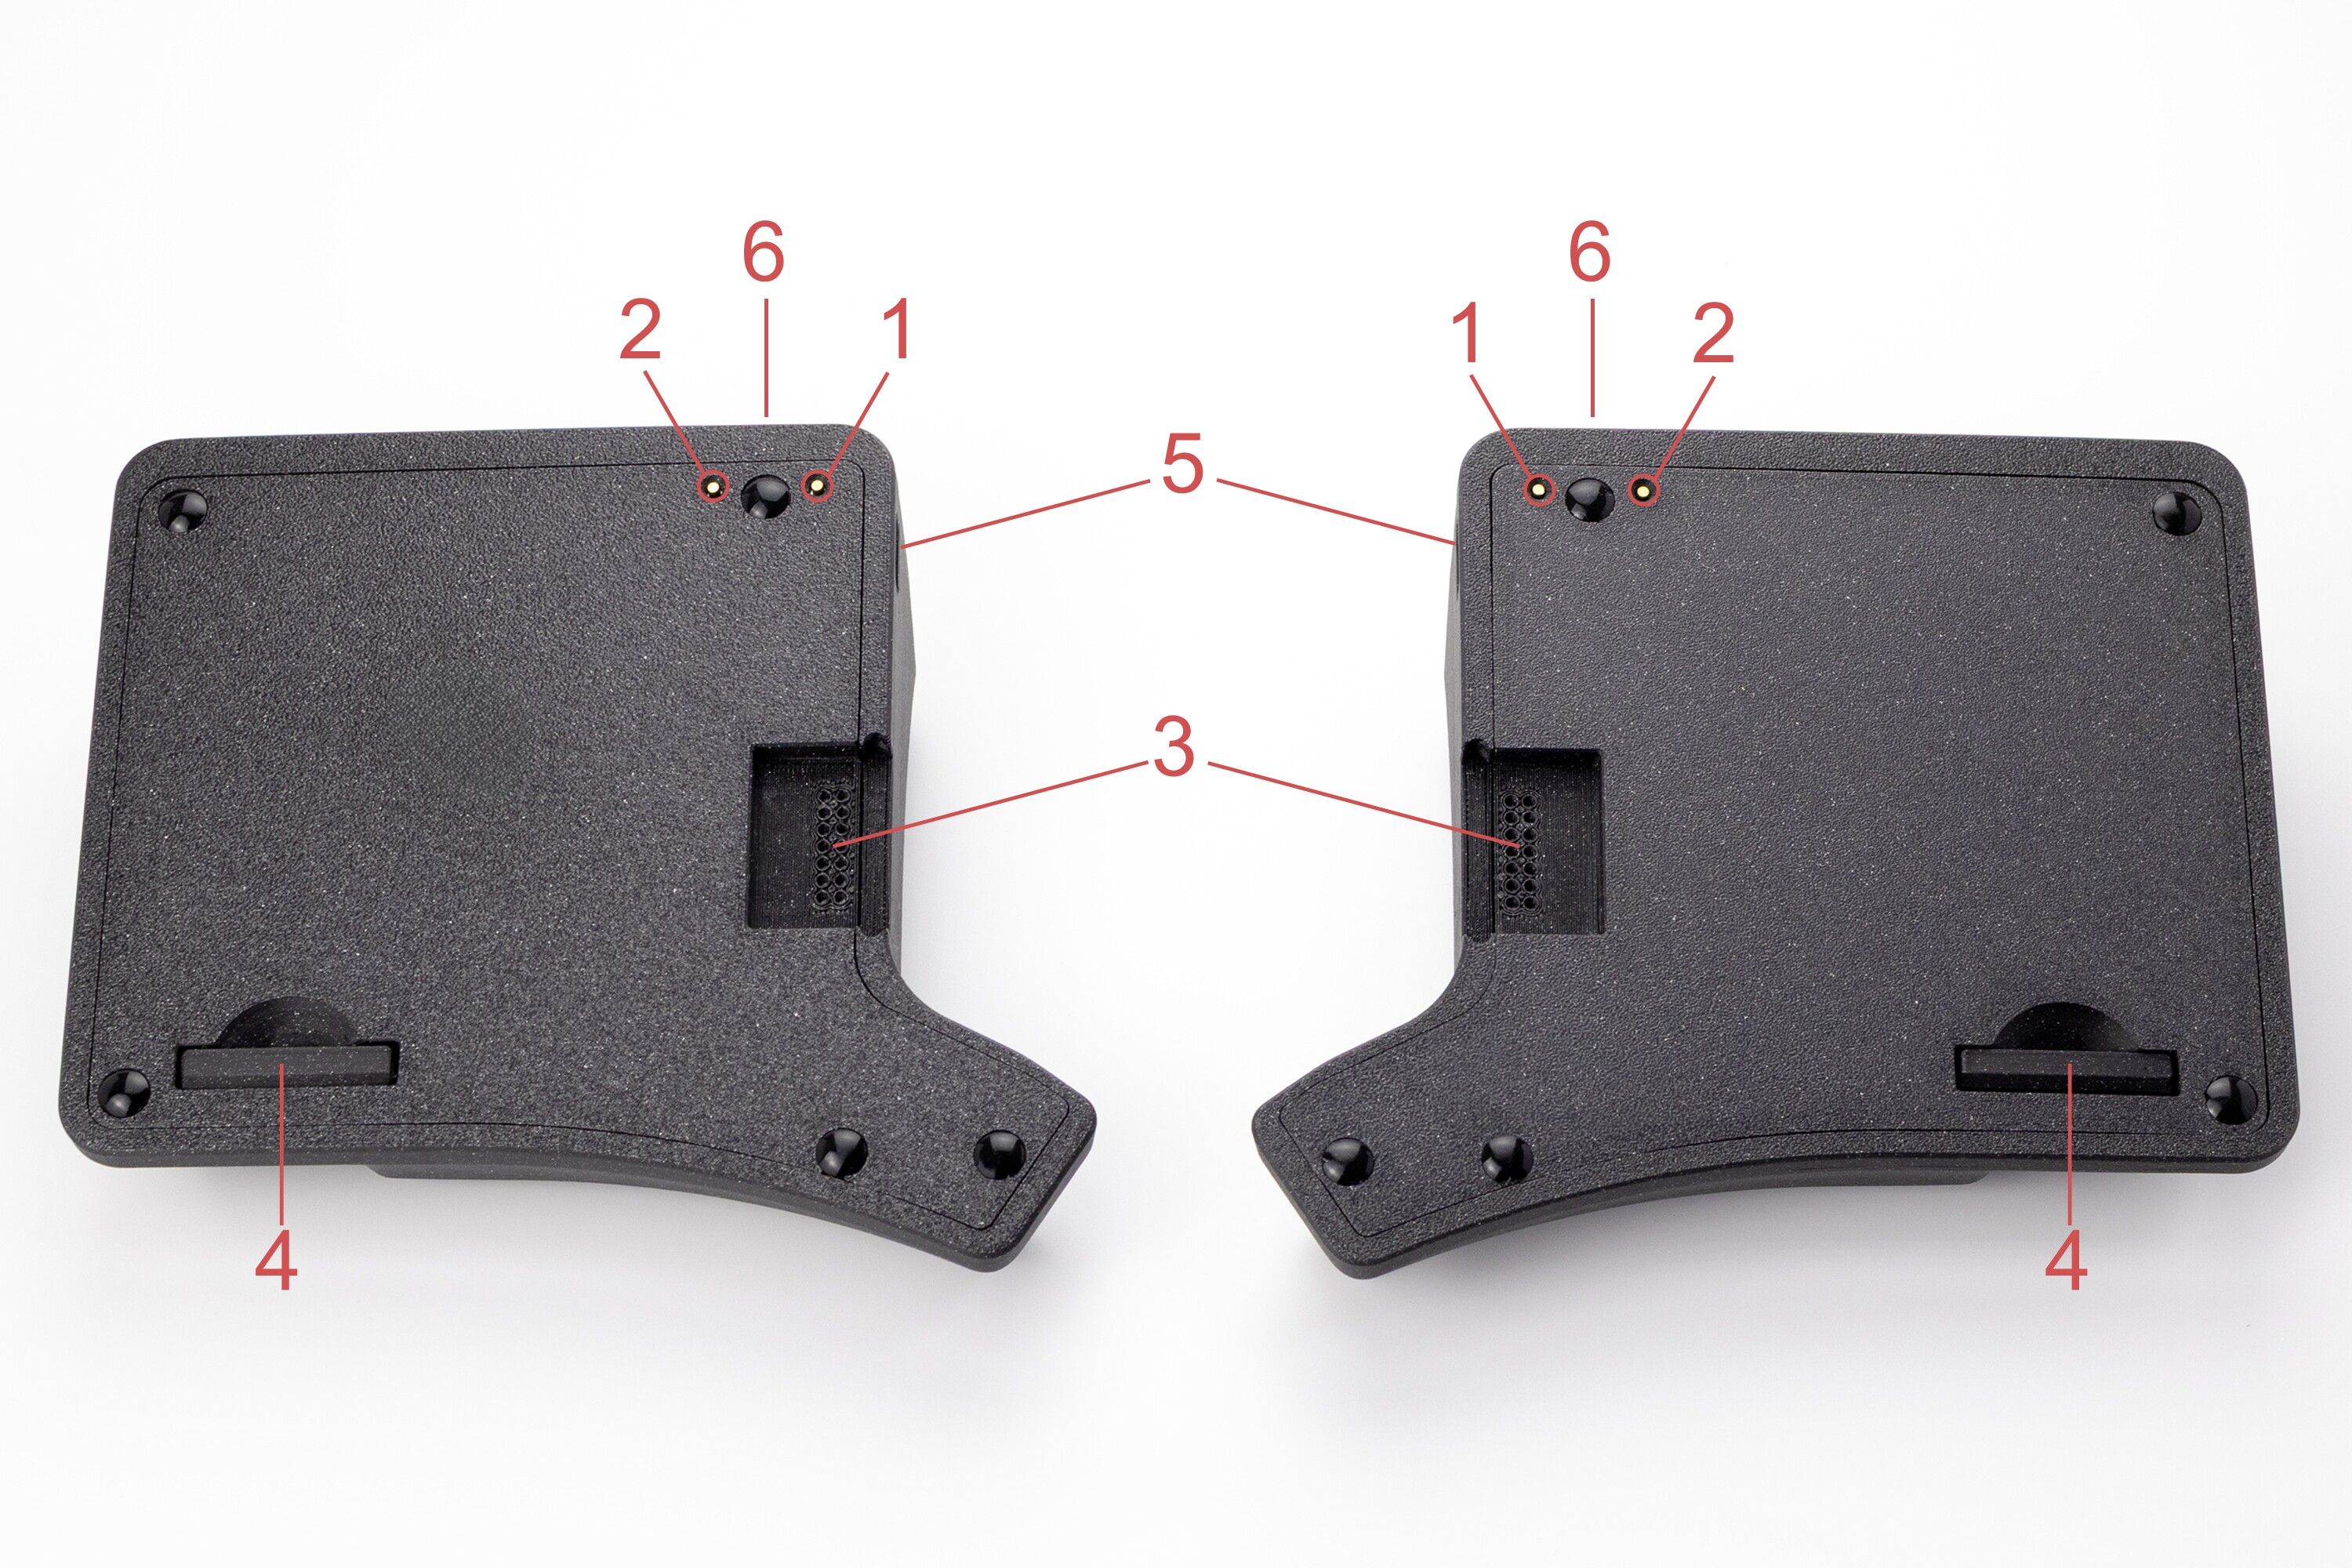
- RESET button
- BOOT button
- hot-swap socket for connecting modules
- case cover plug for using the keyboard without modules
- side USB-C connector for connecting the halves to each other
- interface USB-C connector for connecting to a computer
Connection
- Phenom works with devices running Windows, macOS/iOS, and Linux/Android
- The keyboard uses Plug and Play (PnP), so no additional driver installation is required
- The keyboard ships ready to use with the firmware current at the time of purchase
- Before connecting the keyboard to a computer, make sure the USB-C cable between the halves is firmly inserted
- When connecting the keyboard to a computer, make sure the USB-C cable is firmly inserted into the keyboard’s interface connector
Modules
Phenom supports a modular system for both halves of the keyboard
- Ball size: 38 mm
- Scroll Mode for smooth scrolling
- Sniper Mode for precise cursor control
- Text for convenient text navigation
Modular system connection features
- modules support hot swapping
- modules can be installed in the connectors on either half without reflashing
- when replacing one module with another, the configuration is preserved
- identical modules can be used on both halves
- if no module is installed, the connector is covered with a neat plug
- each module is configured separately, and the active layer is shown by indicator lighting
Configuration
To remap keys and configure the keyboard, use the graphical configurator Entropy
Firmware Reflashing/Update
Preparation:
- Download the latest firmware version here
- Save your layout in the Entropy by opening the “Layout” menu, then selecting “Export layout”
Installation
To reflash/update the firmware, the keyboard must be put into bootloader mode. This can be done in several ways. Choose one:
Using the RESET button:
- Connect the USB power cable and quickly press the RESET button twice on the bottom of the keyboard
- Wait until the controller enters bootloader mode and the storage folder opens
Using the BOOT button:
- Hold the BOOT button on the bottom of the keyboard and connect the USB power cable
- Wait until the controller enters bootloader mode and the storage folder opens
- Copy or drag and drop the UF2 file, after which the controller should immediately reboot and start working in normal mode
- Import the layout in the Entropy by opening the “Layout” menu, then selecting “Import layout”
Care and Maintenance
- Periodically clean dust and dirt from the case with a dry or slightly damp cloth
- For the trackball module: keep the ball, ceramic bearings, and ball cavity clean
Support
The keyboard comes with a 3-year warranty and service support.
If you have any questions about setup, firmware, or operation, please contact the Ergohaven Telegram group or knowledge base