Trackball Royale
Trackball Royale is a wireless ergonomic pointing device with four programmable buttons. The trackball’s body is designed for a more natural hand position, helping to reduce strain during long computer sessions. The case is manufactured using high-precision SLA printing.
Overview
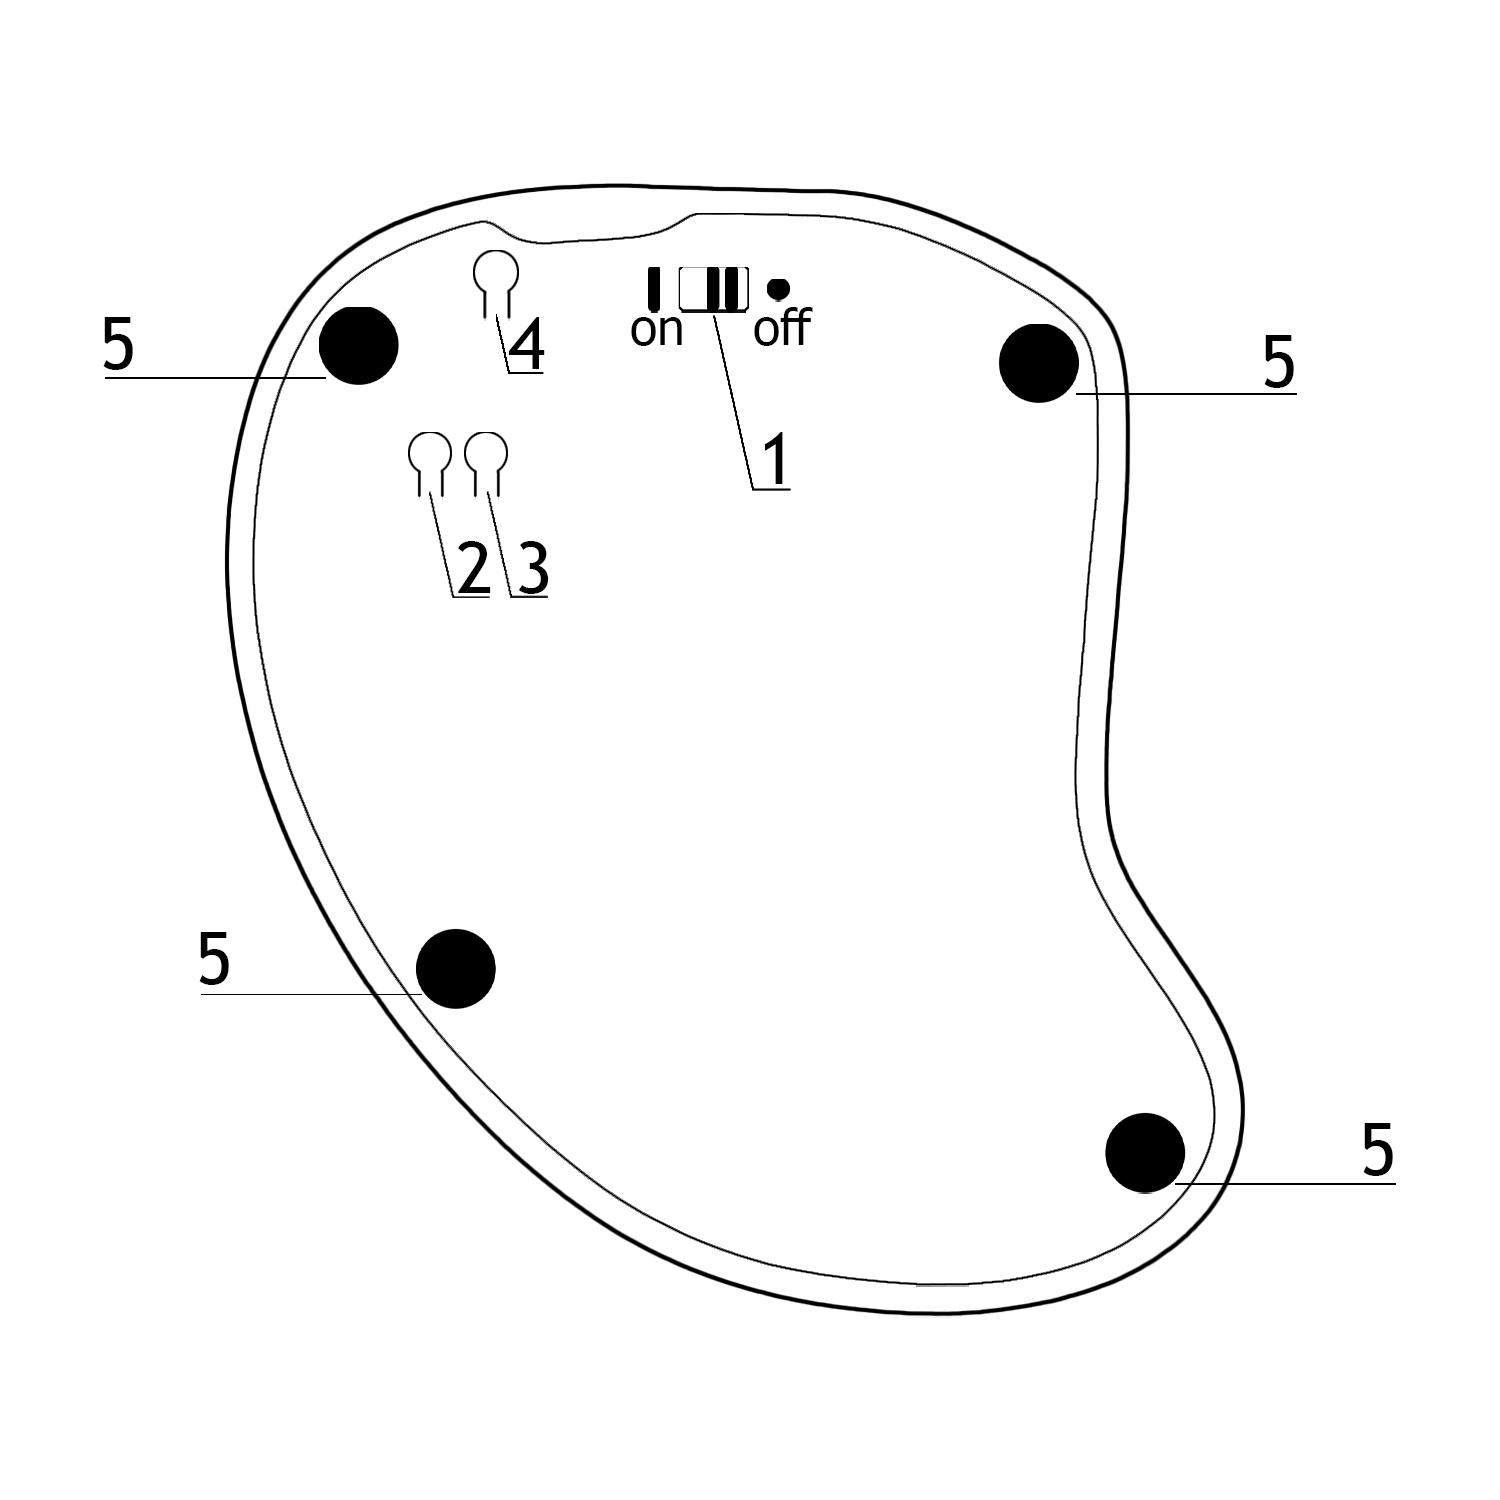
- Power switch
- Button: single press — switch BT profile (0–5 in a cycle), double press (quickly) — clear current BT profile
- Button: single press — switch to BT profile 0, double press (quickly) — clear all BT profiles
- Button: single press — reset, double press (quickly) — bootloader
- Silicone feet
Connectivity
- Trackball Royale works with devices running Windows, macOS, Linux, Android, and iOS
- The trackball connects via Plug and Play (PnP); no additional driver installation is required
- The trackball ships ready to connect to your device with the firmware current at the time of purchase
Wired connection
Wireless connection
- Enable Bluetooth on the device you want to connect the trackball to
- Turn on the trackball by setting the power switch on the bottom cover to the ON position — the trackball will enter pairing mode
- Search for Bluetooth devices on your device and find EH TB Royale in the list
- Connect the trackball to your device
Connecting additional devices
- Enable Bluetooth on the device you want to connect the trackball to
- Turn on the trackball by setting the power switch on the bottom cover to the ON position — the trackball will enter pairing mode
- Switch the BT profile on the trackball using button 2 on the bottom side
- Search for Bluetooth devices on your device and find EH TB Royale in the list
- Connect the trackball to your device
Charging and battery monitoring
Charging and battery monitoring work the same way as for ZMK-based wireless keyboards.
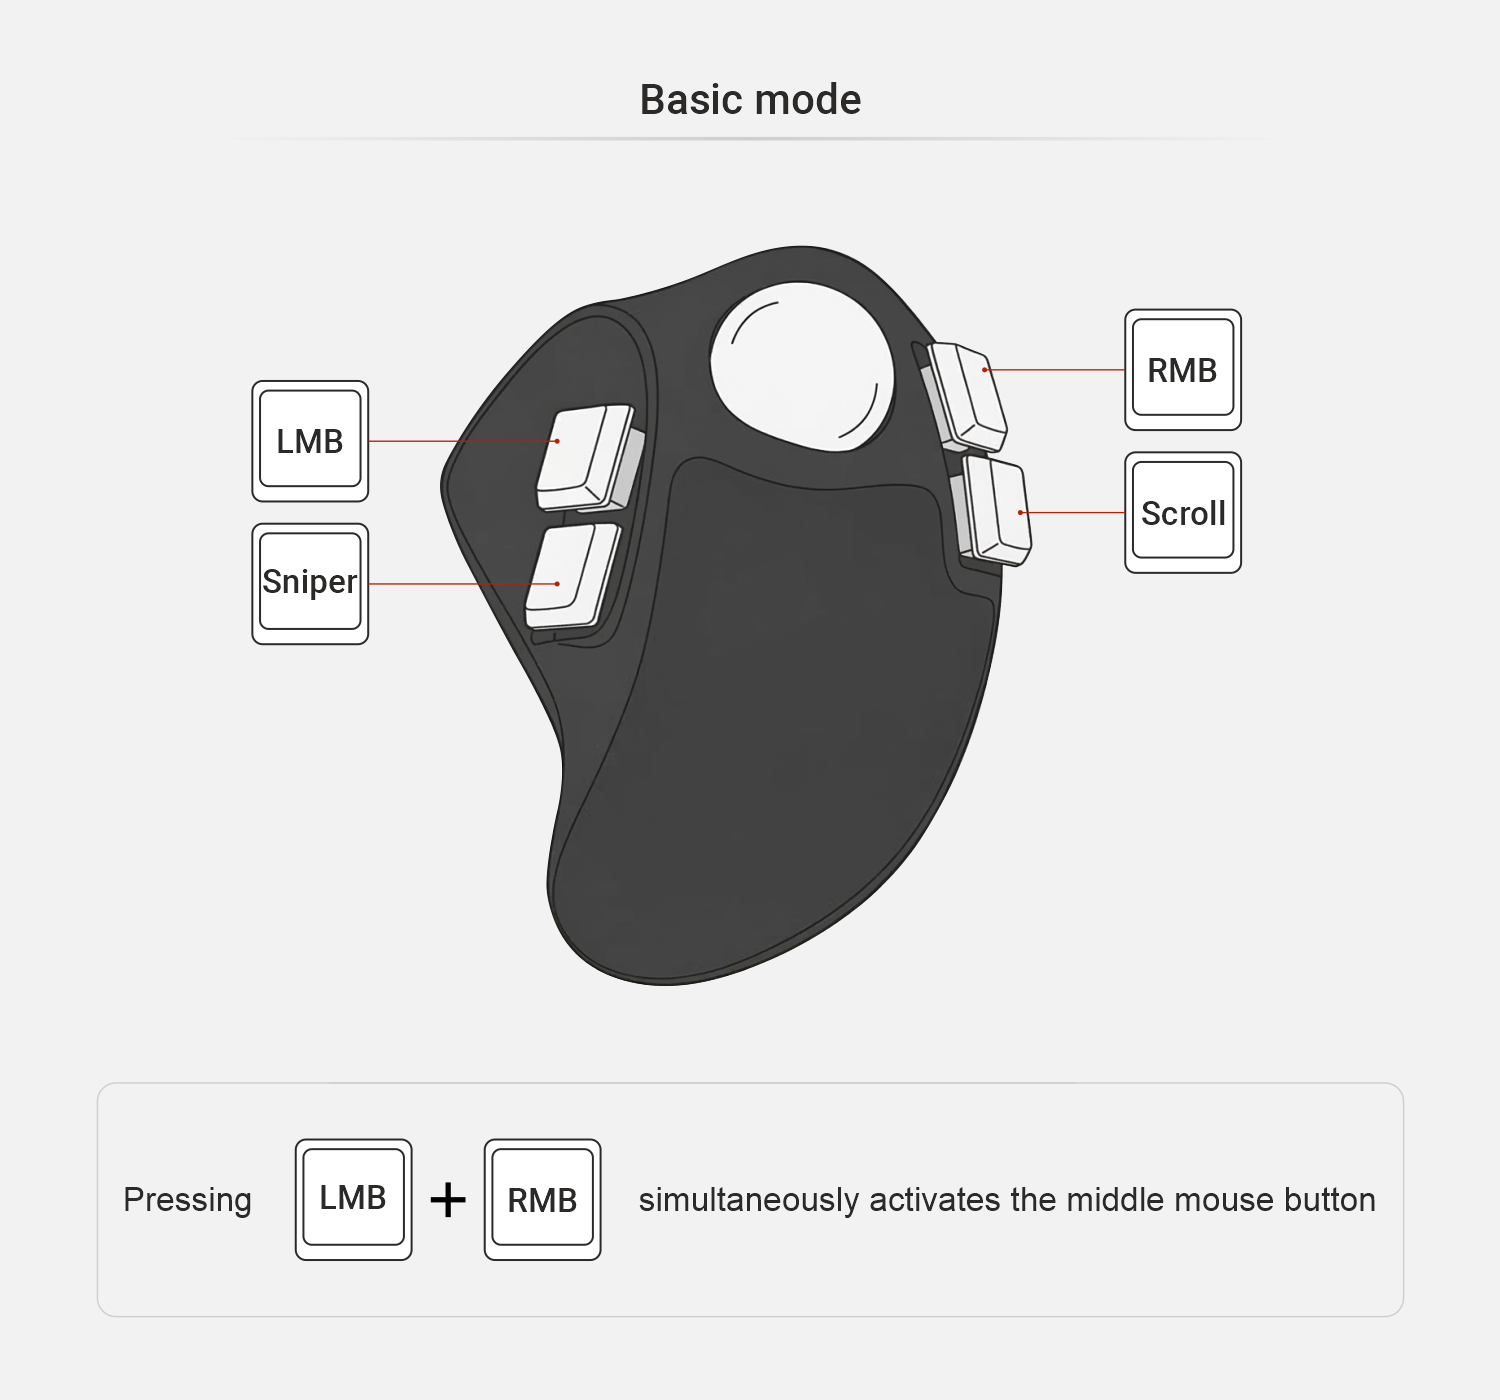
Key configuration
You can assign any behavior to the trackball buttons using the keymap editor. For example, you can swap the Sniper and Scroll keys if that layout works better for you.
Configuration
All trackball modes can be configured in the file config/trackball_royale.keymap. The easiest way to edit it is through the GitHub web interface by clicking the Edit this file button.

Open the file in your fork and scroll to the very bottom, looking for these lines:
&trackball { cpi = <1000>; };

&trackball_listener {
    input-processors = <&zip_xy_scaler 9 20>;

    scroller {
        layers = <1>;
        input-processors =
            <&zip_xy_transform INPUT_TRANSFORM_Y_INVERT>,
            <&zip_xy_scaler 1 32>,
            <&zip_xy_to_scroll_mapper>;
    };

    sniper {
        layers = <2>;
        input-processors = <&zip_xy_scaler 1 4>;
    };

    adjust {
        layers = <3>;
        input-processors = <&zip_xy_scaler 1 8>;
    };
};
Let’s go through all available settings.
Cursor sensitivity in normal mode
You can change the cursor sensitivity in normal mode in the line &trackball { cpi = <1000>; };. The cpi value is set in steps of 200 and must not exceed 3200.
In addition to cpi, a multiplier <&zip_xy_scaler 9 20> is also applied, meaning the actual sensitivity will be nine-twentieths of the base cpi value. This can also be changed.
&trackball_listener {
    input-processors = <&zip_xy_scaler 9 20>;
More about available input-processors can be found in the ZMK documentation: https://zmk.dev/docs/keymaps/input-processors
Scroll mode settings
The following settings are available for scroll mode:
scroller {
    layers = <1>;
    input-processors =
        <&zip_xy_transform INPUT_TRANSFORM_Y_INVERT>,
        <&zip_xy_scaler 1 32>,
        <&zip_xy_to_scroll_mapper>;
};
layers = <1>; — the layers on which scroll mode will be active. If you change the layer number, also update the behavior that switches to the scroll layer.<&zip_xy_transform INPUT_TRANSFORM_Y_INVERT> — inverts scrolling. You can invert the Y axis, the X axis (<&zip_xy_transform INPUT_TRANSFORM_X_INVERT>), or both by listing parameters separated by commas: <&zip_xy_transform INPUT_TRANSFORM_Y_INVERT>, <&zip_xy_transform INPUT_TRANSFORM_X_INVERT>,.<&zip_xy_scaler 1 32> — scroll speed is expressed as a ratio; by default it is one thirty-second. You can slow down scrolling by changing it to, for example, <&zip_xy_scaler 1 64>, or speed it up with <&zip_xy_scaler 2 32>.
Sniper mode settings
The following settings are available for sniper mode:
sniper {
    layers = <2>;
    input-processors = <&zip_xy_scaler 1 4>;
};
layers = <2>; — the layers on which sniper mode will be active. If you change the layer number, also update the behavior that switches to the sniper layer.<&zip_xy_scaler 1 4> — speed multiplier for sniper mode. By default, the cursor speed is reduced to one-quarter in sniper mode.
The cursor slowdown on the adjust settings layer works the same way.
Firmware
Firmware update is needed when:
- A firmware update is available on keymap_hub
- You need to restore the trackball to factory settings
- You are using custom firmware settings via a fork
Preparing to flash
Download the latest settings_reset and Trackball Royale firmware files from keymap_hub.
Settings reset firmware
Connect the trackball to your computer via USB-C cable, then double-press the Reset button on the back of the trackball.
Copy or drag the settings_reset UF2 file — the trackball should restart immediately.
Completing the flash
Double-press the Reset button on the back of the trackball again and wait for it to enter bootloader mode (the storage folder will open).
Copy or drag the Trackball Royale UF2 firmware file — the trackball should restart immediately.
Flashing is complete — you can now connect the trackball to your device!
Care and maintenance
- Periodically clean the case from dust and dirt with a dry or lightly damp cloth
- Keep the ball, ceramic bearings, and ball socket clean
Support
Trackball Royale comes with a 3-year warranty and service support.
If you have any questions about setup, firmware, or operation, please contact the Ergohaven Telegram group or knowledge base