K:03 – Wireless Edition
K:03 – Wireless Edition is a wireless, ergonomic, mechanical split keyboard with a hot-swap system for quick replacement of MX-compatible switches and the ability to install up to 3 hot-swap encoders on each half.
Overview
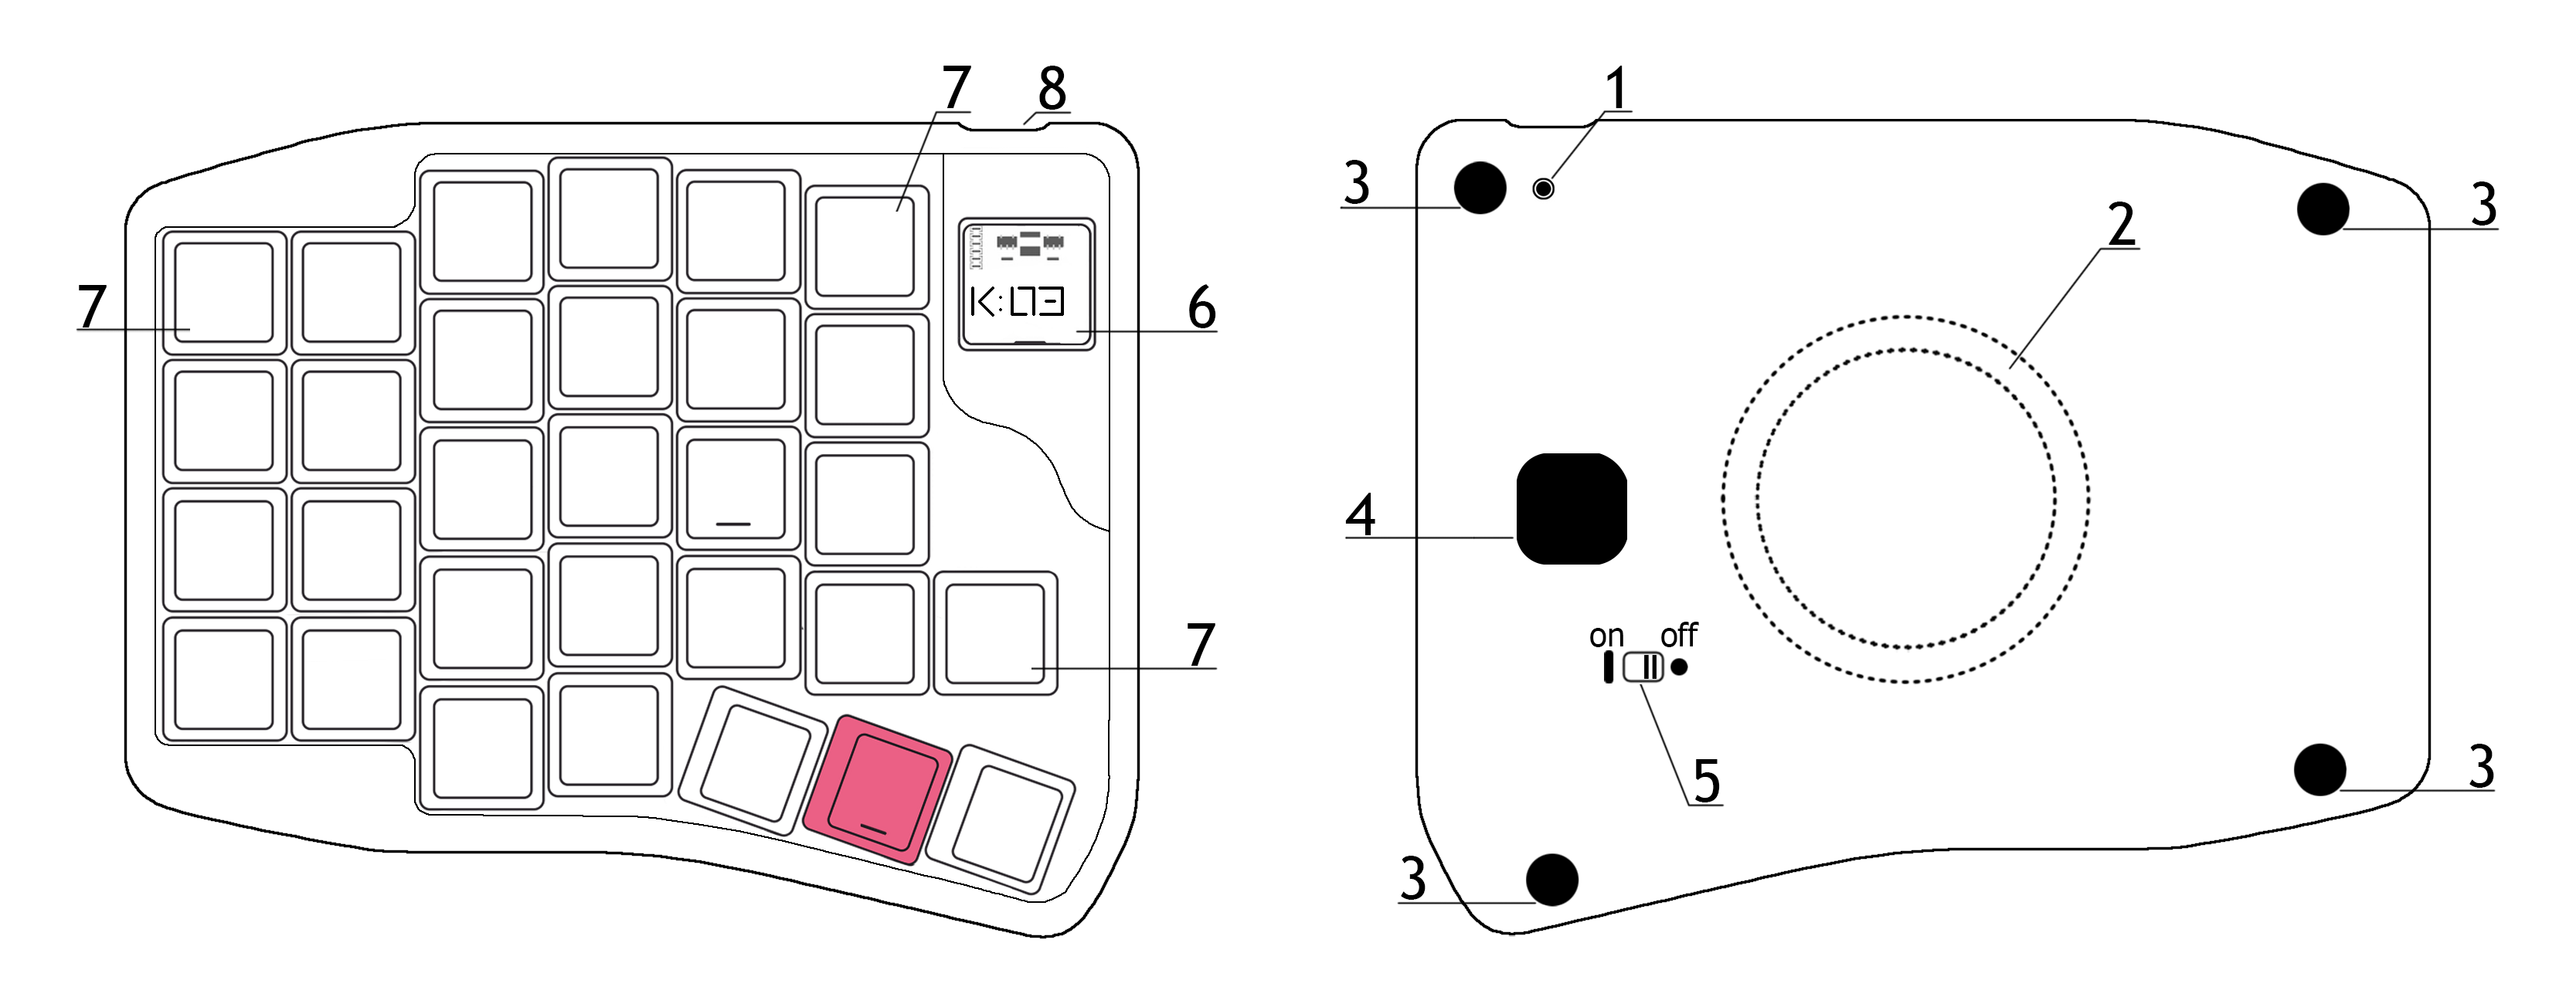
- Button: single press — reset, double press (quickly) — bootloader
- Integrated MagSafe ring for wireless charging
- Silicone feet
- Auxiliary window for disassembling the keyboard case
- Keyboard power switch
- Transparent panel
- Slot for MX switch or hot-swap encoder
- USB-C connector
Connection
- K:03 – Wireless Edition works with devices running Windows, macOS, Linux, Android, iOS
- The keyboard connects via Plug and Play (PnP) — no additional driver installation required
- The keyboard comes ready to connect to your device with the firmware current at the time of purchase
Wired connection
The keyboard supports wired connection via USB-C connector. Use the included cable or any other USB-C cable with data transfer support.
Wireless connection (without Ergohaven’s Qube)
- Turn on both halves of the keyboard — the halves are already synchronized with each other
- Select a connection profile on the keyboard — if you need to connect to multiple devices, you can skip this step for the first connection
- Connect the keyboard to your device — enable Bluetooth on the device, then pair it in the device settings
Connection via Ergohaven’s Qube
Ergohaven’s Qube is a universal dongle for Ergohaven wireless keyboards that displays useful information and reduces keyboard power consumption.
- Connect Ergohaven’s Qube to your computer using a Type-C cable and wait for the Qube to boot
- Turn on the left half of the keyboard — it will automatically connect to the Qube
- Turn on the right half — it will also connect to the Qube, completing the setup
Connecting additional devices
- Enable Bluetooth on the device you want to connect the keyboard to
- Turn on the keyboard by switching the power switches on the bottom covers of both halves to the ON position — the keyboard will enter pairing mode
- Switch the BT profile on the keyboard using the corresponding keys (layer 3 in the default layout)
- Start a Bluetooth search on your device and find the keyboard in the list
- Connect the keyboard to your device
Charging and Battery Monitoring
Refer to the corresponding section of the article First Steps with a ZMK Keyboard
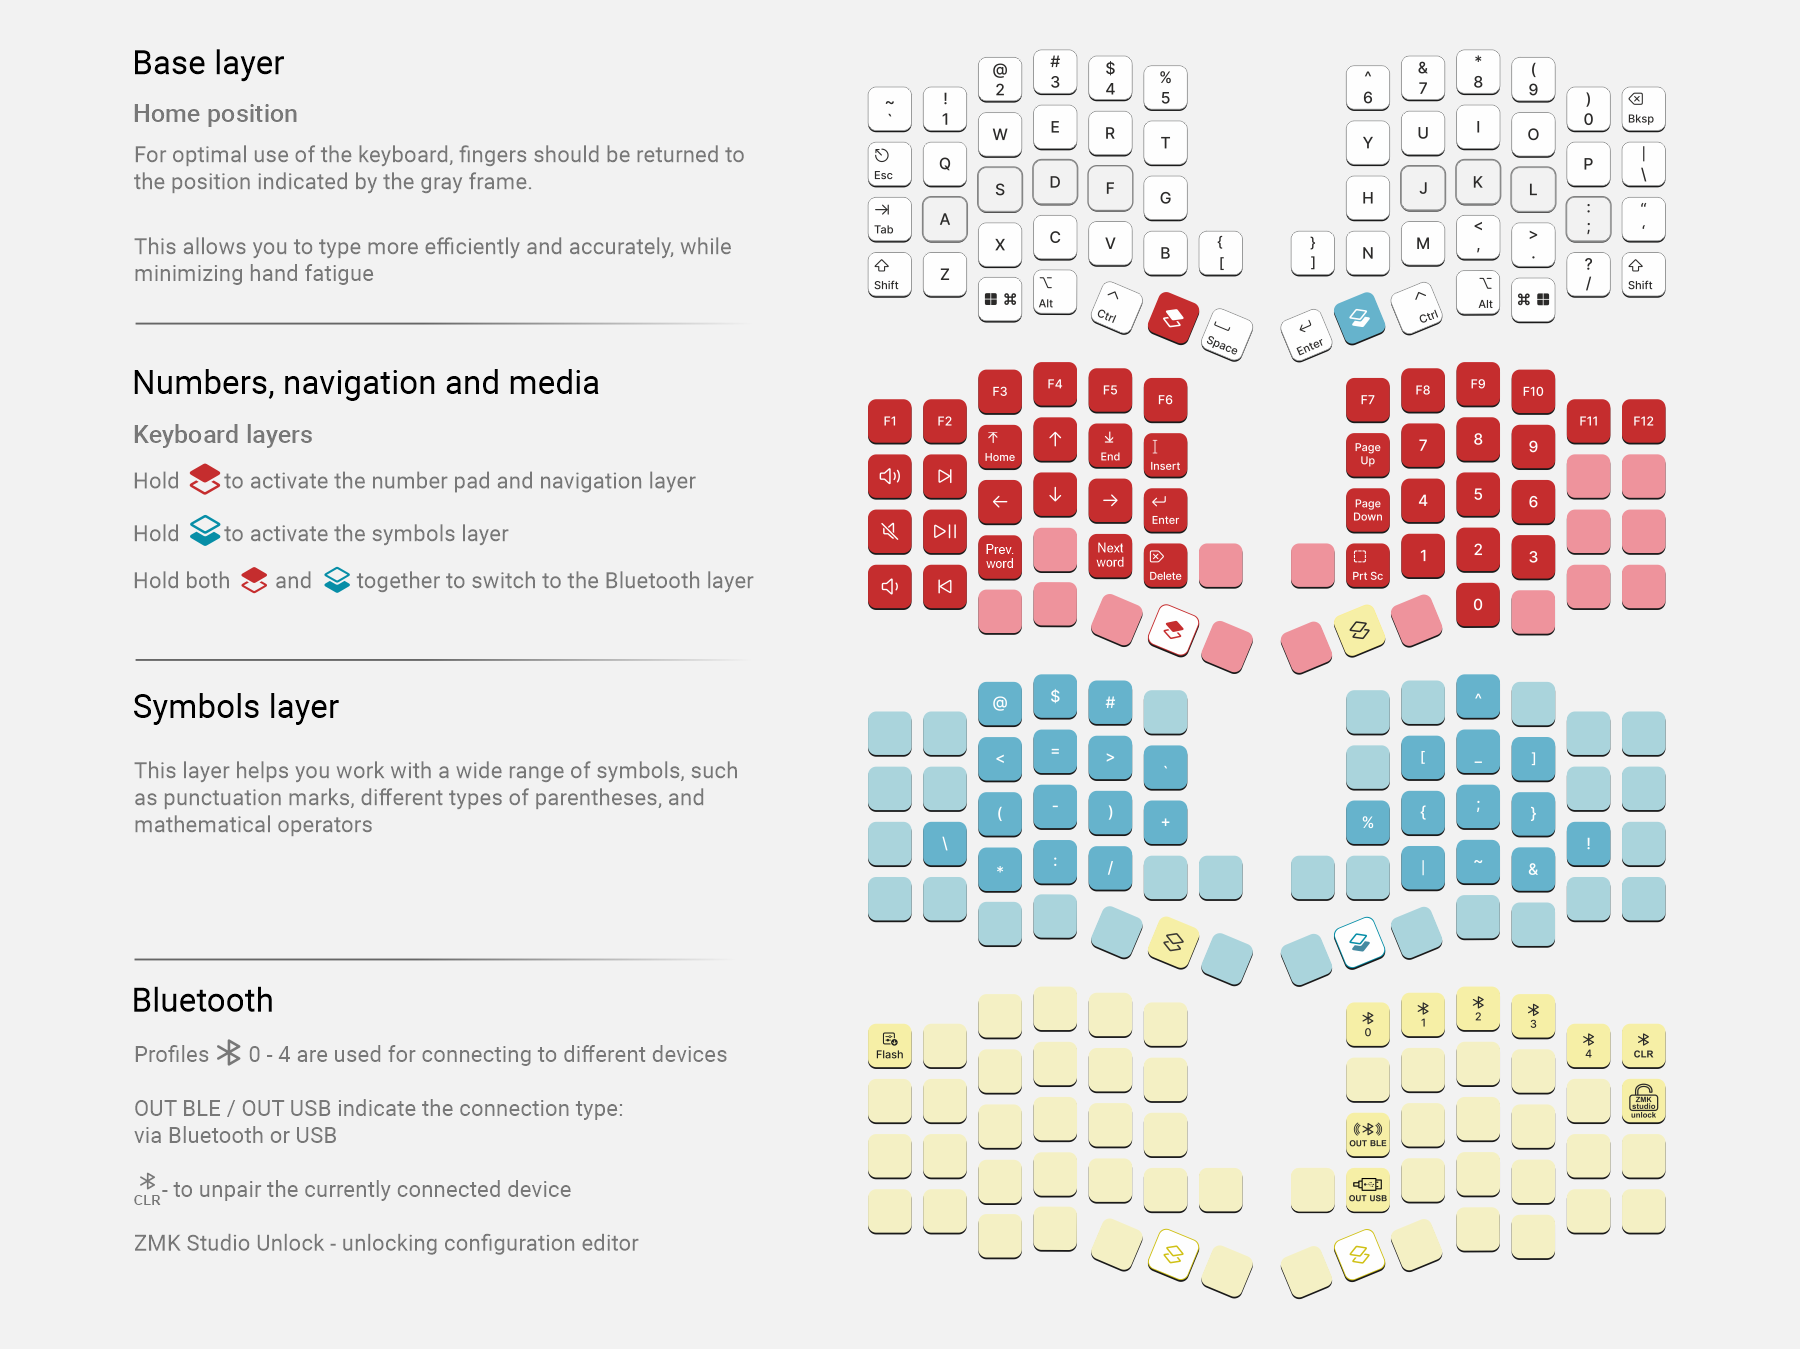
Configuration
Refer to the article Keyboard Configuration in ZMK keymap-editor
Ruen Mode
Refer to the article RuEn Layout for Wireless Keyboards
Firmware
Firmware update is required when:
- A new firmware version has been released on keymap_hub
- You need to restore the keyboard to factory settings
- You are using custom firmware settings via a fork
Preparing for Firmware Update
Download the latest firmware files settings_reset and K:03 v4 for the left and right halves from keymap_hub
Settings Reset Firmware
Connect the left half of the keyboard to your computer (PC, laptop, etc.) using a USB-C cable, then double-press the Reset button on the back of the keyboard.
Copy or drag the settings_reset Uf2 file — the keyboard should reboot automatically.
Completing the Firmware Update
Double-press the Reset button on the back of the left half again and wait for it to enter bootloader mode (the storage folder will open).
Copy or drag the K:03 v4 Uf2 firmware file for the left half — it should reboot automatically.
Firmware update is complete — you can now connect the keyboard to your device!
Firmware Update via Ergohaven’s Qube
Care and Maintenance
- Periodically clean the case from dust and dirt using a dry or slightly damp cloth.
Support
The keyboard comes with a 3-year warranty and service support.
If you have any questions about setup, firmware, or operation, please contact the Ergohaven Telegram group or knowledge base